Tiled Map Editorを起動します。
【準備1】
1.「Tiled Map Editorのインストール方法」の手順でインストールしておきます。
【手順1】
1.Windowsのスタートメニューから『Tiled』⇒『Tiled』を選択。

1.以下の様に起動すれば成功です。

以上です。


| 項目名 | 項目に設定する値 |
| アプリケーション名(Application Name) | com.example.andenginesample040 |
| プロジェクト名(Project Name) | AndEngineSample040-Sound |
| パッケージ名(Package Name) | com.example.andenginesample040 |
| Build SDK | API 8 |
| Minimum Required SDK | API 8 |
<manifest xmlns:android="http://schemas.android.com/apk/res/android"
    package="com.example.andenginesample040"
    android:versionCode="1"
    android:versionName="1.0" >

    <uses-sdk
        android:minSdkVersion="8"
        android:targetSdkVersion="8" />

    <application
        android:icon="@drawable/ic_launcher"
        android:label="@string/app_name"
        android:theme="@style/AppTheme" >
        <activity
            android:name="com.example.andenginesample040.MainActivity"
            android:label="@string/title_activity_main" >
            <intent-filter>
                <action android:name="android.intent.action.MAIN" />

                <category android:name="android.intent.category.LAUNCHER" />
            </intent-filter>
        </activity>
    </application>

</manifest>
2.「Ctrl+Shift+F」を押し、コードをフォーマッティング。package com.example.andenginesample040;
import java.io.IOException;
import org.andengine.audio.sound.Sound;
import org.andengine.audio.sound.SoundFactory;
import org.andengine.engine.camera.Camera;
import org.andengine.engine.options.EngineOptions;
import org.andengine.engine.options.ScreenOrientation;
import org.andengine.engine.options.resolutionpolicy.RatioResolutionPolicy;
import org.andengine.entity.scene.Scene;
import org.andengine.entity.scene.background.Background;
import org.andengine.entity.sprite.ButtonSprite;
import org.andengine.entity.sprite.ButtonSprite.OnClickListener;
import org.andengine.opengl.texture.atlas.bitmap.BitmapTextureAtlas;
import org.andengine.opengl.texture.atlas.bitmap.BitmapTextureAtlasTextureRegionFactory;
import org.andengine.opengl.texture.atlas.bitmap.BuildableBitmapTextureAtlas;
import org.andengine.opengl.texture.atlas.bitmap.source.IBitmapTextureAtlasSource;
import org.andengine.opengl.texture.atlas.buildable.builder.BlackPawnTextureAtlasBuilder;
import org.andengine.opengl.texture.atlas.buildable.builder.ITextureAtlasBuilder.TextureAtlasBuilderException;
import org.andengine.opengl.texture.region.ITextureRegion;
import org.andengine.ui.activity.SimpleBaseGameActivity;
import org.andengine.util.debug.Debug;
import android.widget.Toast;
public class MainActivity extends SimpleBaseGameActivity implements OnClickListener {
private static final float BG_R = 25 / 255.0f;
private static final float BG_G = 160 / 255.0f;
private static final float BG_B = 224 / 255.0f;
private static final int CAMERA_WIDTH = 720;
private static final int CAMERA_HEIGHT = 480;
private ITextureRegion normalTexture;
private ITextureRegion pressedTexture;
private Sound sound;
@Override
public EngineOptions onCreateEngineOptions() {
Camera camera = new Camera(0, 0, CAMERA_WIDTH, CAMERA_HEIGHT);
RatioResolutionPolicy policy = new RatioResolutionPolicy(CAMERA_WIDTH, CAMERA_HEIGHT);
EngineOptions engineOptions = new EngineOptions(true, ScreenOrientation.LANDSCAPE_FIXED, policy, camera);
engineOptions.getAudioOptions().setNeedsSound(true);
return engineOptions;
}
@Override
public void onCreateResources() {
BitmapTextureAtlasTextureRegionFactory.setAssetBasePath("");
BuildableBitmapTextureAtlas bbta = new BuildableBitmapTextureAtlas(this.getTextureManager(), 512, 512);
this.normalTexture= BitmapTextureAtlasTextureRegionFactory.createFromAsset(bbta, this, "box.png");
this.pressedTexture = BitmapTextureAtlasTextureRegionFactory.createFromAsset(bbta, this, "box_red.png");
try {
bbta.build(new BlackPawnTextureAtlasBuilder<IBitmapTextureAtlasSource, BitmapTextureAtlas>(0, 0, 0));
bbta.load();
} catch (TextureAtlasBuilderException e) {
Debug.e(e);
}
SoundFactory.setAssetBasePath("");
try {
this.sound = SoundFactory.createSoundFromAsset(this.mEngine.getSoundManager(), this, "explosion.ogg");
} catch (final IOException e) {
Debug.e(e);
}
}
@Override
public Scene onCreateScene() {
Scene scene = new Scene();
scene.setBackground(new Background(BG_R, BG_G, BG_B));
scene.setTouchAreaBindingOnActionDownEnabled(true);
drawButtonSprite(scene);
return scene;
}
private void drawButtonSprite(Scene scene) {
ButtonSprite buttonSprite = new ButtonSprite(100, 100, this.normalTexture, this.pressedTexture, this.getVertexBufferObjectManager());
buttonSprite.setOnClickListener(this);
scene.registerTouchArea(buttonSprite);
scene.attachChild(buttonSprite);
}
@Override
public void onClick(ButtonSprite buttonSprite, float touchAreaLocalX, float touchAreaLocalY) {
runOnUiThread(new Runnable() {
@Override
public void run() {
Toast.makeText(MainActivity.this, "音を鳴らします。", Toast.LENGTH_LONG).show();
}
});
this.sound.play();
}
}
2.「Ctrl+Shift+F」を押し、コードをフォーマッティング。


| 項目名 | 項目に設定する値 |
| アプリケーション名(Application Name) | com.example.andenginesample045 |
| プロジェクト名(Project Name) | AndEngineSample045-TextColorChangeOK |
| パッケージ名(Package Name) | com.example.andenginesample045 |
| Build SDK | API 8 |
| Minimum Required SDK | API 8 |
<manifest xmlns:android="http://schemas.android.com/apk/res/android"
    package="com.example.andenginesample045"
    android:versionCode="1"
    android:versionName="1.0" >

    <uses-sdk
        android:minSdkVersion="8"
        android:targetSdkVersion="8" />

    <application
        android:icon="@drawable/ic_launcher"
        android:label="@string/app_name"
        android:theme="@style/AppTheme" >
        <activity
            android:name="com.example.andenginesample045.MainActivity"
            android:label="@string/title_activity_main" >
            <intent-filter>
                <action android:name="android.intent.action.MAIN" />

                <category android:name="android.intent.category.LAUNCHER" />
            </intent-filter>
        </activity>
    </application>

</manifest>
2.「Ctrl+Shift+F」を押し、コードをフォーマッティング。package com.example.andenginesample045;
import org.andengine.engine.camera.Camera;
import org.andengine.engine.options.EngineOptions;
import org.andengine.engine.options.ScreenOrientation;
import org.andengine.engine.options.resolutionpolicy.RatioResolutionPolicy;
import org.andengine.entity.scene.Scene;
import org.andengine.entity.scene.background.Background;
import org.andengine.entity.sprite.ButtonSprite;
import org.andengine.entity.sprite.ButtonSprite.OnClickListener;
import org.andengine.entity.text.Text;
import org.andengine.entity.text.TextOptions;
import org.andengine.opengl.font.Font;
import org.andengine.opengl.font.FontFactory;
import org.andengine.opengl.texture.atlas.bitmap.BitmapTextureAtlas;
import org.andengine.opengl.texture.atlas.bitmap.BitmapTextureAtlasTextureRegionFactory;
import org.andengine.opengl.texture.atlas.bitmap.BuildableBitmapTextureAtlas;
import org.andengine.opengl.texture.atlas.bitmap.source.IBitmapTextureAtlasSource;
import org.andengine.opengl.texture.atlas.buildable.builder.BlackPawnTextureAtlasBuilder;
import org.andengine.opengl.texture.atlas.buildable.builder.ITextureAtlasBuilder.TextureAtlasBuilderException;
import org.andengine.opengl.texture.region.ITextureRegion;
import org.andengine.ui.activity.SimpleBaseGameActivity;
import org.andengine.util.HorizontalAlign;
import org.andengine.util.debug.Debug;
import android.graphics.Color;
import android.graphics.Typeface;
public class MainActivity extends SimpleBaseGameActivity implements OnClickListener {
private static final float BG_R = 25 / 255.0f;
private static final float BG_G = 160 / 255.0f;
private static final float BG_B = 224 / 255.0f;
private static final int CAMERA_WIDTH = 720;
private static final int CAMERA_HEIGHT = 480;
private ITextureRegion normalTexture;
private ITextureRegion pressedTexture;
private Font font;
private Text centerText;
@Override
public EngineOptions onCreateEngineOptions() {
Camera camera = new Camera(0, 0, CAMERA_WIDTH, CAMERA_HEIGHT);
RatioResolutionPolicy policy = new RatioResolutionPolicy(CAMERA_WIDTH, CAMERA_HEIGHT);
return new EngineOptions(true, ScreenOrientation.LANDSCAPE_FIXED, policy, camera);
}
@Override
public void onCreateResources() {
BitmapTextureAtlasTextureRegionFactory.setAssetBasePath("");
BuildableBitmapTextureAtlas bbta = new BuildableBitmapTextureAtlas(this.getTextureManager(), 512, 512);
this.normalTexture = BitmapTextureAtlasTextureRegionFactory.createFromAsset(bbta, this, "box.png");
this.pressedTexture = BitmapTextureAtlasTextureRegionFactory.createFromAsset(bbta, this, "box_red.png");
try {
bbta.build(new BlackPawnTextureAtlasBuilder<IBitmapTextureAtlasSource, BitmapTextureAtlas>(0, 0, 0));
bbta.load();
} catch (TextureAtlasBuilderException e) {
Debug.e(e);
}
this.font = FontFactory.create(this.getFontManager(), this.getTextureManager(), 256, 256, Typeface.create(Typeface.DEFAULT, Typeface.BOLD), 32, Color.WHITE);
this.font.load();
}
@Override
public Scene onCreateScene() {
Scene scene = new Scene();
scene.setBackground(new Background(BG_R, BG_G, BG_B));
drawButtonSprite(scene);
drawText(scene);
return scene;
}
private void drawText(Scene scene) {
this.centerText = new Text(100, 40, this.font, "Hello AndEngine! AndEngine!", new TextOptions(HorizontalAlign.CENTER), this.getVertexBufferObjectManager());
scene.attachChild(centerText);
}
private void drawButtonSprite(Scene scene) {
ButtonSprite buttonSprite = new ButtonSprite(100, 100, this.normalTexture, this.pressedTexture, this.getVertexBufferObjectManager());
buttonSprite.setOnClickListener(this);
scene.registerTouchArea(buttonSprite);
scene.attachChild(buttonSprite);
}
@Override
public void onClick(ButtonSprite buttonSprite, float touchAreaLocalX, float touchAreaLocalY) {
centerText.setColor(1.0f, 0.0f, 0.0f);
}
}
2.「Ctrl+Shift+F」を押し、コードをフォーマッティング。

| 項目名 | 項目に設定する値 |
| アプリケーション名(Application Name) | com.example.andenginesample044 |
| プロジェクト名(Project Name) | AndEngineSample044-TextColorChangeNG |
| パッケージ名(Package Name) | com.example.andenginesample044 |
| Build SDK | API 8 |
| Minimum Required SDK | API 8 |
<manifest xmlns:android="http://schemas.android.com/apk/res/android"
    package="com.example.andenginesample044"
    android:versionCode="1"
    android:versionName="1.0" >

    <uses-sdk
        android:minSdkVersion="8"
        android:targetSdkVersion="8" />

    <application
        android:icon="@drawable/ic_launcher"
        android:label="@string/app_name"
        android:theme="@style/AppTheme" >
        <activity
            android:name="com.example.andenginesample044.MainActivity"
            android:label="@string/title_activity_main" >
            <intent-filter>
                <action android:name="android.intent.action.MAIN" />

                <category android:name="android.intent.category.LAUNCHER" />
            </intent-filter>
        </activity>
    </application>

</manifest>
2.「Ctrl+Shift+F」を押し、コードをフォーマッティング。package com.example.andenginesample044;
import org.andengine.engine.camera.Camera;
import org.andengine.engine.options.EngineOptions;
import org.andengine.engine.options.ScreenOrientation;
import org.andengine.engine.options.resolutionpolicy.RatioResolutionPolicy;
import org.andengine.entity.scene.Scene;
import org.andengine.entity.scene.background.Background;
import org.andengine.entity.sprite.ButtonSprite;
import org.andengine.entity.sprite.ButtonSprite.OnClickListener;
import org.andengine.entity.text.Text;
import org.andengine.entity.text.TextOptions;
import org.andengine.opengl.font.Font;
import org.andengine.opengl.font.FontFactory;
import org.andengine.opengl.texture.atlas.bitmap.BitmapTextureAtlas;
import org.andengine.opengl.texture.atlas.bitmap.BitmapTextureAtlasTextureRegionFactory;
import org.andengine.opengl.texture.atlas.bitmap.BuildableBitmapTextureAtlas;
import org.andengine.opengl.texture.atlas.bitmap.source.IBitmapTextureAtlasSource;
import org.andengine.opengl.texture.atlas.buildable.builder.BlackPawnTextureAtlasBuilder;
import org.andengine.opengl.texture.atlas.buildable.builder.ITextureAtlasBuilder.TextureAtlasBuilderException;
import org.andengine.opengl.texture.region.ITextureRegion;
import org.andengine.ui.activity.SimpleBaseGameActivity;
import org.andengine.util.HorizontalAlign;
import org.andengine.util.debug.Debug;
import android.graphics.Color;
import android.graphics.Typeface;
public class MainActivity extends SimpleBaseGameActivity implements OnClickListener {
private static final float BG_R = 25 / 255.0f;
private static final float BG_G = 160 / 255.0f;
private static final float BG_B = 224 / 255.0f;
private static final int CAMERA_WIDTH = 720;
private static final int CAMERA_HEIGHT = 480;
private ITextureRegion normalTexture;
private ITextureRegion pressedTexture;
private Font font;
private Text centerText;
@Override
public EngineOptions onCreateEngineOptions() {
Camera camera = new Camera(0, 0, CAMERA_WIDTH, CAMERA_HEIGHT);
RatioResolutionPolicy policy = new RatioResolutionPolicy(CAMERA_WIDTH, CAMERA_HEIGHT);
return new EngineOptions(true, ScreenOrientation.LANDSCAPE_FIXED, policy, camera);
}
@Override
public void onCreateResources() {
BitmapTextureAtlasTextureRegionFactory.setAssetBasePath("");
BuildableBitmapTextureAtlas bbta = new BuildableBitmapTextureAtlas(this.getTextureManager(), 512, 512);
this.normalTexture = BitmapTextureAtlasTextureRegionFactory.createFromAsset(bbta, this, "box.png");
this.pressedTexture = BitmapTextureAtlasTextureRegionFactory.createFromAsset(bbta, this, "box_red.png");
try {
bbta.build(new BlackPawnTextureAtlasBuilder<IBitmapTextureAtlasSource, BitmapTextureAtlas>(0, 0, 0));
bbta.load();
} catch (TextureAtlasBuilderException e) {
Debug.e(e);
}
this.font = FontFactory.create(this.getFontManager(), this.getTextureManager(), 256, 256, Typeface.create(Typeface.DEFAULT, Typeface.BOLD), 32, Color.BLUE);
this.font.load();
}
@Override
public Scene onCreateScene() {
Scene scene = new Scene();
scene.setBackground(new Background(BG_R, BG_G, BG_B));
drawButtonSprite(scene);
drawText(scene);
return scene;
}
private void drawText(Scene scene) {
this.centerText = new Text(100, 40, this.font, "Hello AndEngine! AndEngine!", new TextOptions(HorizontalAlign.CENTER), this.getVertexBufferObjectManager());
scene.attachChild(centerText);
}
private void drawButtonSprite(Scene scene) {
ButtonSprite buttonSprite = new ButtonSprite(100, 100, this.normalTexture, this.pressedTexture, this.getVertexBufferObjectManager());
buttonSprite.setOnClickListener(this);
scene.registerTouchArea(buttonSprite);
scene.attachChild(buttonSprite);
}
@Override
public void onClick(ButtonSprite buttonSprite, float touchAreaLocalX, float touchAreaLocalY) {
centerText.setColor(1.0f, 0.0f, 0.0f);
}
}
2.「Ctrl+Shift+F」を押し、コードをフォーマッティング。

| 項目名 | 項目に設定する値 |
| アプリケーション名(Application Name) | com.example.andenginesample043 |
| プロジェクト名(Project Name) | AndEngineSample043-TextOtfFont |
| パッケージ名(Package Name) | com.example.andenginesample043 |
| Build SDK | API 8 |
| Minimum Required SDK | API 8 |
<manifest xmlns:android="http://schemas.android.com/apk/res/android"
    package="com.example.andenginesample043"
    android:versionCode="1"
    android:versionName="1.0" >

    <uses-sdk
        android:minSdkVersion="8"
        android:targetSdkVersion="8" />

    <application
        android:icon="@drawable/ic_launcher"
        android:label="@string/app_name"
        android:theme="@style/AppTheme" >
        <activity
            android:name="com.example.andenginesample043.MainActivity"
            android:label="@string/title_activity_main" >
            <intent-filter>
                <action android:name="android.intent.action.MAIN" />

                <category android:name="android.intent.category.LAUNCHER" />
            </intent-filter>
        </activity>
    </application>

</manifest>
2.「Ctrl+Shift+F」を押し、コードをフォーマッティング。package com.example.andenginesample043;
import org.andengine.engine.camera.Camera;
import org.andengine.engine.options.EngineOptions;
import org.andengine.engine.options.ScreenOrientation;
import org.andengine.engine.options.resolutionpolicy.RatioResolutionPolicy;
import org.andengine.entity.scene.Scene;
import org.andengine.entity.scene.background.Background;
import org.andengine.entity.text.Text;
import org.andengine.entity.text.TextOptions;
import org.andengine.opengl.font.Font;
import org.andengine.opengl.font.FontFactory;
import org.andengine.opengl.texture.ITexture;
import org.andengine.opengl.texture.TextureOptions;
import org.andengine.opengl.texture.atlas.bitmap.BitmapTextureAtlas;
import org.andengine.ui.activity.SimpleBaseGameActivity;
import org.andengine.util.HorizontalAlign;
import android.graphics.Color;
public class MainActivity extends SimpleBaseGameActivity {
private static final float BG_R = 25 / 255.0f;
private static final float BG_G = 160 / 255.0f;
private static final float BG_B = 224 / 255.0f;
private static final int CAMERA_WIDTH = 720;
private static final int CAMERA_HEIGHT = 480;
private Font font;
@Override
public EngineOptions onCreateEngineOptions() {
Camera camera = new Camera(0, 0, CAMERA_WIDTH, CAMERA_HEIGHT);
RatioResolutionPolicy policy = new RatioResolutionPolicy(CAMERA_WIDTH, CAMERA_HEIGHT);
return new EngineOptions(true, ScreenOrientation.LANDSCAPE_FIXED, policy, camera);
}
@Override
public void onCreateResources() {
ITexture fontTexture = new BitmapTextureAtlas(this.getTextureManager(), 256, 256, TextureOptions.BILINEAR);
FontFactory.setAssetBasePath("");
this.font = FontFactory.createFromAsset(this.getFontManager(), fontTexture, this.getAssets(), "fontopo.otf", 24, true, Color.BLACK);
this.font.load();
}
@Override
public Scene onCreateScene() {
Scene scene = new Scene();
scene.setBackground(new Background(BG_R, BG_G, BG_B));
drawText(scene);
return scene;
}
private void drawText(Scene scene) {
Text centerText = new Text(100, 40, this.font, "Hello AndEngine! AndEngine!\n CENTER Align", new TextOptions(HorizontalAlign.CENTER), this.getVertexBufferObjectManager());
Text leftText = new Text(100, 170, this.font, "Hello AndEngine! AndEngine!\nLEFT Align ", new TextOptions(HorizontalAlign.LEFT), this.getVertexBufferObjectManager());
Text rightText = new Text(100, 300, this.font, "Hello AndEngine! AndEngine!\nRIGHT Align", new TextOptions(HorizontalAlign.RIGHT), this.getVertexBufferObjectManager());
scene.attachChild(centerText);
scene.attachChild(leftText);
scene.attachChild(rightText);
}
}
2.「Ctrl+Shift+F」を押し、コードをフォーマッティング。
| 項目名 | 項目に設定する値 |
| アプリケーション名(Application Name) | com.example.andenginesample042 |
| プロジェクト名(Project Name) | AndEngineSample042-TextTtfFont |
| パッケージ名(Package Name) | com.example.andenginesample042 |
| Build SDK | API 8 |
| Minimum Required SDK | API 8 |
<manifest xmlns:android="http://schemas.android.com/apk/res/android"
    package="com.example.andenginesample042"
    android:versionCode="1"
    android:versionName="1.0" >

    <uses-sdk
        android:minSdkVersion="8"
        android:targetSdkVersion="8" />

    <application
        android:icon="@drawable/ic_launcher"
        android:label="@string/app_name"
        android:theme="@style/AppTheme" >
        <activity
            android:name="com.example.andenginesample042.MainActivity"
            android:label="@string/title_activity_main" >
            <intent-filter>
                <action android:name="android.intent.action.MAIN" />

                <category android:name="android.intent.category.LAUNCHER" />
            </intent-filter>
        </activity>
    </application>

</manifest>
2.「Ctrl+Shift+F」を押し、コードをフォーマッティング。package com.example.andenginesample042;
import org.andengine.engine.camera.Camera;
import org.andengine.engine.options.EngineOptions;
import org.andengine.engine.options.ScreenOrientation;
import org.andengine.engine.options.resolutionpolicy.RatioResolutionPolicy;
import org.andengine.entity.scene.Scene;
import org.andengine.entity.scene.background.Background;
import org.andengine.entity.text.Text;
import org.andengine.entity.text.TextOptions;
import org.andengine.opengl.font.Font;
import org.andengine.opengl.font.FontFactory;
import org.andengine.opengl.texture.ITexture;
import org.andengine.opengl.texture.TextureOptions;
import org.andengine.opengl.texture.atlas.bitmap.BitmapTextureAtlas;
import org.andengine.ui.activity.SimpleBaseGameActivity;
import org.andengine.util.HorizontalAlign;
import android.graphics.Color;
public class MainActivity extends SimpleBaseGameActivity {
private static final float BG_R = 25 / 255.0f;
private static final float BG_G = 160 / 255.0f;
private static final float BG_B = 224 / 255.0f;
private static final int CAMERA_WIDTH = 720;
private static final int CAMERA_HEIGHT = 480;
private Font droidFont;
@Override
public EngineOptions onCreateEngineOptions() {
Camera camera = new Camera(0, 0, CAMERA_WIDTH, CAMERA_HEIGHT);
RatioResolutionPolicy policy = new RatioResolutionPolicy(CAMERA_WIDTH, CAMERA_HEIGHT);
return new EngineOptions(true, ScreenOrientation.LANDSCAPE_FIXED, policy, camera);
}
@Override
public void onCreateResources() {
ITexture droidFontTexture = new BitmapTextureAtlas(this.getTextureManager(), 256, 256, TextureOptions.BILINEAR);
FontFactory.setAssetBasePath("");
this.droidFont = FontFactory.createFromAsset(this.getFontManager(), droidFontTexture, this.getAssets(), "Droid.ttf", 24, true, Color.BLACK);
this.droidFont.load();
}
@Override
public Scene onCreateScene() {
Scene scene = new Scene();
scene.setBackground(new Background(BG_R, BG_G, BG_B));
drawText(scene);
return scene;
}
private void drawText(Scene scene) {
Text centerText = new Text(100, 40, this.droidFont, "Hello AndEngine! AndEngine!\n CENTER Align", new TextOptions(HorizontalAlign.CENTER), this.getVertexBufferObjectManager());
Text leftText = new Text(100, 170, this.droidFont, "Hello AndEngine! AndEngine!\nLEFT Align ", new TextOptions(HorizontalAlign.LEFT), this.getVertexBufferObjectManager());
Text rightText = new Text(100, 300, this.droidFont, "Hello AndEngine! AndEngine!\nRIGHT Align", new TextOptions(HorizontalAlign.RIGHT), this.getVertexBufferObjectManager());
scene.attachChild(centerText);
scene.attachChild(leftText);
scene.attachChild(rightText);
}
}
2.「Ctrl+Shift+F」を押し、コードをフォーマッティング。
| 項目名 | 項目に設定する値 |
| アプリケーション名(Application Name) | com.example.andenginesample041 |
| プロジェクト名(Project Name) | AndEngineSample041-AnimatedSprite |
| パッケージ名(Package Name) | com.example.andenginesample041 |
| Build SDK | API 8 |
| Minimum Required SDK | API 8 |
<manifest xmlns:android="http://schemas.android.com/apk/res/android"
    package="com.example.andenginesample041"
    android:versionCode="1"
    android:versionName="1.0" >

    <uses-sdk
        android:minSdkVersion="8"
        android:targetSdkVersion="8" />

    <application
        android:icon="@drawable/ic_launcher"
        android:label="@string/app_name"
        android:theme="@style/AppTheme" >
        <activity
            android:name="com.example.andenginesample041.MainActivity"
            android:label="@string/title_activity_main" >
            <intent-filter>
                <action android:name="android.intent.action.MAIN" />

                <category android:name="android.intent.category.LAUNCHER" />
            </intent-filter>
        </activity>
    </application>

</manifest>
2.「Ctrl+Shift+F」を押し、コードをフォーマッティング。package com.example.andenginesample041;
import org.andengine.engine.camera.Camera;
import org.andengine.engine.options.EngineOptions;
import org.andengine.engine.options.ScreenOrientation;
import org.andengine.engine.options.resolutionpolicy.RatioResolutionPolicy;
import org.andengine.entity.scene.Scene;
import org.andengine.entity.scene.background.Background;
import org.andengine.entity.sprite.AnimatedSprite;
import org.andengine.opengl.texture.atlas.bitmap.BitmapTextureAtlas;
import org.andengine.opengl.texture.atlas.bitmap.BitmapTextureAtlasTextureRegionFactory;
import org.andengine.opengl.texture.atlas.bitmap.BuildableBitmapTextureAtlas;
import org.andengine.opengl.texture.atlas.bitmap.source.IBitmapTextureAtlasSource;
import org.andengine.opengl.texture.atlas.buildable.builder.BlackPawnTextureAtlasBuilder;
import org.andengine.opengl.texture.atlas.buildable.builder.ITextureAtlasBuilder.TextureAtlasBuilderException;
import org.andengine.opengl.texture.region.TiledTextureRegion;
import org.andengine.ui.activity.SimpleBaseGameActivity;
import org.andengine.util.debug.Debug;
public class MainActivity extends SimpleBaseGameActivity {
private static final float BG_R = 25 / 255.0f;
private static final float BG_G = 160 / 255.0f;
private static final float BG_B = 224 / 255.0f;
private static final int CAMERA_WIDTH = 720;
private static final int CAMERA_HEIGHT = 480;
private TiledTextureRegion texture;
@Override
public EngineOptions onCreateEngineOptions() {
Camera camera = new Camera(0, 0, CAMERA_WIDTH, CAMERA_HEIGHT);
RatioResolutionPolicy policy = new RatioResolutionPolicy(CAMERA_WIDTH, CAMERA_HEIGHT);
return new EngineOptions(true, ScreenOrientation.LANDSCAPE_FIXED, policy, camera);
}
@Override
public void onCreateResources() {
BitmapTextureAtlasTextureRegionFactory.setAssetBasePath("");
BuildableBitmapTextureAtlas bbta = new BuildableBitmapTextureAtlas(this.getTextureManager(), 512, 512);
this.texture = BitmapTextureAtlasTextureRegionFactory.createTiledFromAsset(bbta, this, "box_tiled.png", 2, 1);
try {
bbta.build(new BlackPawnTextureAtlasBuilder<IBitmapTextureAtlasSource, BitmapTextureAtlas>(0, 0, 0));
bbta.load();
} catch (TextureAtlasBuilderException e) {
Debug.e(e);
}
}
@Override
public Scene onCreateScene() {
Scene scene = new Scene();
scene.setBackground(new Background(BG_R, BG_G, BG_B));
scene.setTouchAreaBindingOnActionDownEnabled(true);
drawAnimatedSprite(scene);
return scene;
}
private void drawAnimatedSprite(Scene scene) {
AnimatedSprite animatedSprite = new AnimatedSprite(100, 100, this.texture, this.getVertexBufferObjectManager());
animatedSprite.animate(500);
scene.attachChild(animatedSprite);
}
}
2.「Ctrl+Shift+F」を押し、コードをフォーマッティング。


| 項目名 | 項目に設定する値 |
| アプリケーション名(Application Name) | com.example.andenginesample039 |
| プロジェクト名(Project Name) | AndEngineSample039-ButtonSpriteTagOnClick |
| パッケージ名(Package Name) | com.example.andenginesample039 |
| Build SDK | API 8 |
| Minimum Required SDK | API 8 |
<manifest xmlns:android="http://schemas.android.com/apk/res/android"
    package="com.example.andenginesample039"
    android:versionCode="1"
    android:versionName="1.0" >

    <uses-sdk
        android:minSdkVersion="8"
        android:targetSdkVersion="8" />

    <application
        android:icon="@drawable/ic_launcher"
        android:label="@string/app_name"
        android:theme="@style/AppTheme" >
        <activity
            android:name="com.example.andenginesample039.MainActivity"
            android:label="@string/title_activity_main" >
            <intent-filter>
                <action android:name="android.intent.action.MAIN" />

                <category android:name="android.intent.category.LAUNCHER" />
            </intent-filter>
        </activity>
    </application>

</manifest>
2.「Ctrl+Shift+F」を押し、コードをフォーマッティング。package com.example.andenginesample039;
import org.andengine.engine.camera.Camera;
import org.andengine.engine.options.EngineOptions;
import org.andengine.engine.options.ScreenOrientation;
import org.andengine.engine.options.resolutionpolicy.RatioResolutionPolicy;
import org.andengine.entity.scene.Scene;
import org.andengine.entity.scene.background.Background;
import org.andengine.entity.sprite.ButtonSprite;
import org.andengine.entity.sprite.ButtonSprite.OnClickListener;
import org.andengine.opengl.texture.atlas.bitmap.BitmapTextureAtlas;
import org.andengine.opengl.texture.atlas.bitmap.BitmapTextureAtlasTextureRegionFactory;
import org.andengine.opengl.texture.atlas.bitmap.BuildableBitmapTextureAtlas;
import org.andengine.opengl.texture.atlas.bitmap.source.IBitmapTextureAtlasSource;
import org.andengine.opengl.texture.atlas.buildable.builder.BlackPawnTextureAtlasBuilder;
import org.andengine.opengl.texture.atlas.buildable.builder.ITextureAtlasBuilder.TextureAtlasBuilderException;
import org.andengine.opengl.texture.region.ITextureRegion;
import org.andengine.ui.activity.SimpleBaseGameActivity;
import org.andengine.util.debug.Debug;
import android.widget.Toast;
public class MainActivity extends SimpleBaseGameActivity implements OnClickListener {
private static final float BG_R = 25 / 255.0f;
private static final float BG_G = 160 / 255.0f;
private static final float BG_B = 224 / 255.0f;
private static final int CAMERA_WIDTH = 720;
private static final int CAMERA_HEIGHT = 480;
private static final int BUTTON_TAG1 = 1;
private static final int BUTTON_TAG2 = 2;
private ITextureRegion normalTexture;
private ITextureRegion pressedTexture;
@Override
public EngineOptions onCreateEngineOptions() {
Camera camera = new Camera(0, 0, CAMERA_WIDTH, CAMERA_HEIGHT);
RatioResolutionPolicy policy = new RatioResolutionPolicy(CAMERA_WIDTH, CAMERA_HEIGHT);
return new EngineOptions(true, ScreenOrientation.LANDSCAPE_FIXED, policy, camera);
}
@Override
public void onCreateResources() {
BitmapTextureAtlasTextureRegionFactory.setAssetBasePath("");
BuildableBitmapTextureAtlas bbta = new BuildableBitmapTextureAtlas(this.getTextureManager(), 512, 512);
this.normalTexture = BitmapTextureAtlasTextureRegionFactory.createFromAsset(bbta, this, "box.png");
this.pressedTexture = BitmapTextureAtlasTextureRegionFactory.createFromAsset(bbta, this, "box_red.png");
try {
bbta.build(new BlackPawnTextureAtlasBuilder<IBitmapTextureAtlasSource, BitmapTextureAtlas>(0, 0, 0));
bbta.load();
} catch (TextureAtlasBuilderException e) {
Debug.e(e);
}
}
@Override
public Scene onCreateScene() {
Scene scene = new Scene();
scene.setBackground(new Background(BG_R, BG_G, BG_B));
scene.setTouchAreaBindingOnActionDownEnabled(true);
drawButtonSprite(scene);
return scene;
}
private void drawButtonSprite(Scene scene) {
ButtonSprite buttonSprite1 = new ButtonSprite(100, 100, this.normalTexture, this.pressedTexture, this.getVertexBufferObjectManager());
buttonSprite1.setTag(BUTTON_TAG1);
buttonSprite1.setOnClickListener(this);
scene.registerTouchArea(buttonSprite1);
scene.attachChild(buttonSprite1);
ButtonSprite buttonSprite2 = new ButtonSprite(200, 100, this.normalTexture, this.pressedTexture, this.getVertexBufferObjectManager());
buttonSprite2.setTag(BUTTON_TAG2);
buttonSprite2.setOnClickListener(this);
scene.registerTouchArea(buttonSprite2);
scene.attachChild(buttonSprite2);
}
@Override
public void onClick(ButtonSprite buttonSprite, float touchAreaLocalX, float touchAreaLocalY) {
switch (buttonSprite.getTag()) {
case BUTTON_TAG1:
runOnUiThread(new Runnable() {
@Override
public void run() {
Toast.makeText(MainActivity.this, "ボタン1がクリックされました。", Toast.LENGTH_LONG).show();
}
});
break;
case BUTTON_TAG2:
runOnUiThread(new Runnable() {
@Override
public void run() {
Toast.makeText(MainActivity.this, "ボタン2がクリックされました。", Toast.LENGTH_LONG).show();
}
});
break;
}
}
}
2.「Ctrl+Shift+F」を押し、コードをフォーマッティング。

| 項目名 | 項目に設定する値 |
| アプリケーション名(Application Name) | com.example.andenginesample038 |
| プロジェクト名(Project Name) | AndEngineSample038-ButtonSpriteOnClick |
| パッケージ名(Package Name) | com.example.andenginesample038 |
| Build SDK | API 8 |
| Minimum Required SDK | API 8 |
<manifest xmlns:android="http://schemas.android.com/apk/res/android"
    package="com.example.andenginesample038"
    android:versionCode="1"
    android:versionName="1.0" >

    <uses-sdk
        android:minSdkVersion="8"
        android:targetSdkVersion="8" />

    <application
        android:icon="@drawable/ic_launcher"
        android:label="@string/app_name"
        android:theme="@style/AppTheme" >
        <activity
            android:name="com.example.andenginesample038.MainActivity"
            android:label="@string/title_activity_main" >
            <intent-filter>
                <action android:name="android.intent.action.MAIN" />

                <category android:name="android.intent.category.LAUNCHER" />
            </intent-filter>
        </activity>
    </application>

</manifest>
2.「Ctrl+Shift+F」を押し、コードをフォーマッティング。package com.example.andenginesample038;
import org.andengine.engine.camera.Camera;
import org.andengine.engine.options.EngineOptions;
import org.andengine.engine.options.ScreenOrientation;
import org.andengine.engine.options.resolutionpolicy.RatioResolutionPolicy;
import org.andengine.entity.scene.Scene;
import org.andengine.entity.scene.background.Background;
import org.andengine.entity.sprite.ButtonSprite;
import org.andengine.entity.sprite.ButtonSprite.OnClickListener;
import org.andengine.opengl.texture.atlas.bitmap.BitmapTextureAtlas;
import org.andengine.opengl.texture.atlas.bitmap.BitmapTextureAtlasTextureRegionFactory;
import org.andengine.opengl.texture.atlas.bitmap.BuildableBitmapTextureAtlas;
import org.andengine.opengl.texture.atlas.bitmap.source.IBitmapTextureAtlasSource;
import org.andengine.opengl.texture.atlas.buildable.builder.BlackPawnTextureAtlasBuilder;
import org.andengine.opengl.texture.atlas.buildable.builder.ITextureAtlasBuilder.TextureAtlasBuilderException;
import org.andengine.opengl.texture.region.ITextureRegion;
import org.andengine.ui.activity.SimpleBaseGameActivity;
import org.andengine.util.debug.Debug;
import android.widget.Toast;
public class MainActivity extends SimpleBaseGameActivity implements OnClickListener {
private static final float BG_R = 25 / 255.0f;
private static final float BG_G = 160 / 255.0f;
private static final float BG_B = 224 / 255.0f;
private static final int CAMERA_WIDTH = 720;
private static final int CAMERA_HEIGHT = 480;
private ITextureRegion normalTexture;
private ITextureRegion pressedTexture;
@Override
public EngineOptions onCreateEngineOptions() {
Camera camera = new Camera(0, 0, CAMERA_WIDTH, CAMERA_HEIGHT);
RatioResolutionPolicy policy = new RatioResolutionPolicy(CAMERA_WIDTH, CAMERA_HEIGHT);
return new EngineOptions(true, ScreenOrientation.LANDSCAPE_FIXED, policy, camera);
}
@Override
public void onCreateResources() {
BitmapTextureAtlasTextureRegionFactory.setAssetBasePath("");
BuildableBitmapTextureAtlas bbta = new BuildableBitmapTextureAtlas(this.getTextureManager(), 512, 512);
this.normalTexture= BitmapTextureAtlasTextureRegionFactory.createFromAsset(bbta, this, "box.png");
this.pressedTexture = BitmapTextureAtlasTextureRegionFactory.createFromAsset(bbta, this, "box_red.png");
try {
bbta.build(new BlackPawnTextureAtlasBuilder<IBitmapTextureAtlasSource, BitmapTextureAtlas>(0, 0, 0));
bbta.load();
} catch (TextureAtlasBuilderException e) {
Debug.e(e);
}
}
@Override
public Scene onCreateScene() {
Scene scene = new Scene();
scene.setBackground(new Background(BG_R, BG_G, BG_B));
scene.setTouchAreaBindingOnActionDownEnabled(true);
drawButtonSprite(scene);
return scene;
}
private void drawButtonSprite(Scene scene) {
ButtonSprite buttonSprite = new ButtonSprite(100, 100, this.normalTexture, this.pressedTexture, this.getVertexBufferObjectManager());
buttonSprite.setOnClickListener(this);
scene.registerTouchArea(buttonSprite);
scene.attachChild(buttonSprite);
}
@Override
public void onClick(ButtonSprite buttonSprite, float touchAreaLocalX, float touchAreaLocalY) {
runOnUiThread(new Runnable() {
@Override
public void run() {
Toast.makeText(MainActivity.this, "クリックされました。", Toast.LENGTH_LONG).show();
}
});
}
}
2.「Ctrl+Shift+F」を押し、コードをフォーマッティング。
| 項目名 | 項目に設定する値 |
| アプリケーション名(Application Name) | com.example.andenginesample037 |
| プロジェクト名(Project Name) | AndEngineSample037-ButtonSprite |
| パッケージ名(Package Name) | com.example.andenginesample037 |
| Build SDK | API 8 |
| Minimum Required SDK | API 8 |
<manifest xmlns:android="http://schemas.android.com/apk/res/android"
    package="com.example.andenginesample037"
    android:versionCode="1"
    android:versionName="1.0" >

    <uses-sdk
        android:minSdkVersion="8"
        android:targetSdkVersion="8" />

    <application
        android:icon="@drawable/ic_launcher"
        android:label="@string/app_name"
        android:theme="@style/AppTheme" >
        <activity
            android:name="com.example.andenginesample037.MainActivity"
            android:label="@string/title_activity_main" >
            <intent-filter>
                <action android:name="android.intent.action.MAIN" />

                <category android:name="android.intent.category.LAUNCHER" />
            </intent-filter>
        </activity>
    </application>

</manifest>
2.「Ctrl+Shift+F」を押し、コードをフォーマッティング。package com.example.andenginesample037;
import org.andengine.engine.camera.Camera;
import org.andengine.engine.options.EngineOptions;
import org.andengine.engine.options.ScreenOrientation;
import org.andengine.engine.options.resolutionpolicy.RatioResolutionPolicy;
import org.andengine.entity.scene.Scene;
import org.andengine.entity.scene.background.Background;
import org.andengine.entity.sprite.ButtonSprite;
import org.andengine.opengl.texture.atlas.bitmap.BitmapTextureAtlas;
import org.andengine.opengl.texture.atlas.bitmap.BitmapTextureAtlasTextureRegionFactory;
import org.andengine.opengl.texture.atlas.bitmap.BuildableBitmapTextureAtlas;
import org.andengine.opengl.texture.atlas.bitmap.source.IBitmapTextureAtlasSource;
import org.andengine.opengl.texture.atlas.buildable.builder.BlackPawnTextureAtlasBuilder;
import org.andengine.opengl.texture.atlas.buildable.builder.ITextureAtlasBuilder.TextureAtlasBuilderException;
import org.andengine.opengl.texture.region.ITextureRegion;
import org.andengine.ui.activity.SimpleBaseGameActivity;
import org.andengine.util.debug.Debug;
public class MainActivity extends SimpleBaseGameActivity {
private static final float BG_R = 25 / 255.0f;
private static final float BG_G = 160 / 255.0f;
private static final float BG_B = 224 / 255.0f;
private static final int CAMERA_WIDTH = 720;
private static final int CAMERA_HEIGHT = 480;
private ITextureRegion normalTexture;
private ITextureRegion pressedTexture;
@Override
public EngineOptions onCreateEngineOptions() {
Camera camera = new Camera(0, 0, CAMERA_WIDTH, CAMERA_HEIGHT);
RatioResolutionPolicy policy = new RatioResolutionPolicy(CAMERA_WIDTH, CAMERA_HEIGHT);
return new EngineOptions(true, ScreenOrientation.LANDSCAPE_FIXED, policy, camera);
}
@Override
public void onCreateResources() {
BitmapTextureAtlasTextureRegionFactory.setAssetBasePath("");
BuildableBitmapTextureAtlas bbta = new BuildableBitmapTextureAtlas(this.getTextureManager(), 512, 512);
this.normalTexture= BitmapTextureAtlasTextureRegionFactory.createFromAsset(bbta, this, "box.png");
this.pressedTexture = BitmapTextureAtlasTextureRegionFactory.createFromAsset(bbta, this, "box_red.png");
try {
bbta.build(new BlackPawnTextureAtlasBuilder<IBitmapTextureAtlasSource, BitmapTextureAtlas>(0, 0, 0));
bbta.load();
} catch (TextureAtlasBuilderException e) {
Debug.e(e);
}
}
@Override
public Scene onCreateScene() {
Scene scene = new Scene();
scene.setBackground(new Background(BG_R, BG_G, BG_B));
scene.setTouchAreaBindingOnActionDownEnabled(true);
drawButtonSprite(scene);
return scene;
}
private void drawButtonSprite(Scene scene) {
ButtonSprite buttonSprite = new ButtonSprite(100, 100, this.normalTexture, this.pressedTexture, this.getVertexBufferObjectManager());
scene.registerTouchArea(buttonSprite);
scene.attachChild(buttonSprite);
}
}
2.「Ctrl+Shift+F」を押し、コードをフォーマッティング。

| 項目名 | 項目に設定する値 |
| アプリケーション名(Application Name) | com.example.andenginesample036 |
| プロジェクト名(Project Name) | AndEngineSample036-TimerHandlerCountDown |
| パッケージ名(Package Name) | com.example.andenginesample036 |
| Build SDK | API 8 |
| Minimum Required SDK | API 8 |
<manifest xmlns:android="http://schemas.android.com/apk/res/android"
    package="com.example.andenginesample036"
    android:versionCode="1"
    android:versionName="1.0" >

    <uses-sdk
        android:minSdkVersion="8"
        android:targetSdkVersion="8" />

    <application
        android:icon="@drawable/ic_launcher"
        android:label="@string/app_name"
        android:theme="@style/AppTheme" >
        <activity
            android:name="com.example.andenginesample036.MainActivity"
            android:label="@string/title_activity_main" >
            <intent-filter>
                <action android:name="android.intent.action.MAIN" />

                <category android:name="android.intent.category.LAUNCHER" />
            </intent-filter>
        </activity>
    </application>

</manifest>
2.「Ctrl+Shift+F」を押し、コードをフォーマッティング。package com.example.andenginesample036;
import org.andengine.engine.camera.Camera;
import org.andengine.engine.handler.timer.ITimerCallback;
import org.andengine.engine.handler.timer.TimerHandler;
import org.andengine.engine.options.EngineOptions;
import org.andengine.engine.options.ScreenOrientation;
import org.andengine.engine.options.resolutionpolicy.RatioResolutionPolicy;
import org.andengine.entity.scene.Scene;
import org.andengine.entity.scene.background.Background;
import org.andengine.entity.text.Text;
import org.andengine.entity.text.TextOptions;
import org.andengine.opengl.font.Font;
import org.andengine.opengl.font.FontFactory;
import org.andengine.ui.activity.SimpleBaseGameActivity;
import org.andengine.util.HorizontalAlign;
import android.graphics.Typeface;
public class MainActivity extends SimpleBaseGameActivity {
private static final float BG_R = 25 / 255.0f;
private static final float BG_G = 160 / 255.0f;
private static final float BG_B = 224 / 255.0f;
private static final int CAMERA_WIDTH = 720;
private static final int CAMERA_HEIGHT = 480;
private Font font;
private int count = 10;
@Override
public EngineOptions onCreateEngineOptions() {
Camera camera = new Camera(0, 0, CAMERA_WIDTH, CAMERA_HEIGHT);
RatioResolutionPolicy policy = new RatioResolutionPolicy(CAMERA_WIDTH, CAMERA_HEIGHT);
return new EngineOptions(true, ScreenOrientation.LANDSCAPE_FIXED, policy, camera);
}
@Override
public void onCreateResources() {
this.font = FontFactory.create(this.getFontManager(), this.getTextureManager(), 256, 256, Typeface.create(Typeface.DEFAULT, Typeface.BOLD), 32);
this.font.load();
}
@Override
public Scene onCreateScene() {
Scene scene = new Scene();
scene.setBackground(new Background(BG_R, BG_G, BG_B));
registTimerHandler(scene);
return scene;
}
private void registTimerHandler(Scene scene) {
final Text centerText = new Text(100, 40, this.font, " ", new TextOptions(HorizontalAlign.CENTER), this.getVertexBufferObjectManager());
scene.attachChild(centerText);
TimerHandler timerHandler = new TimerHandler(1.0f, false, new ITimerCallback() {
public void onTimePassed(TimerHandler timerHandler) {
count--;
if (count == 0) {
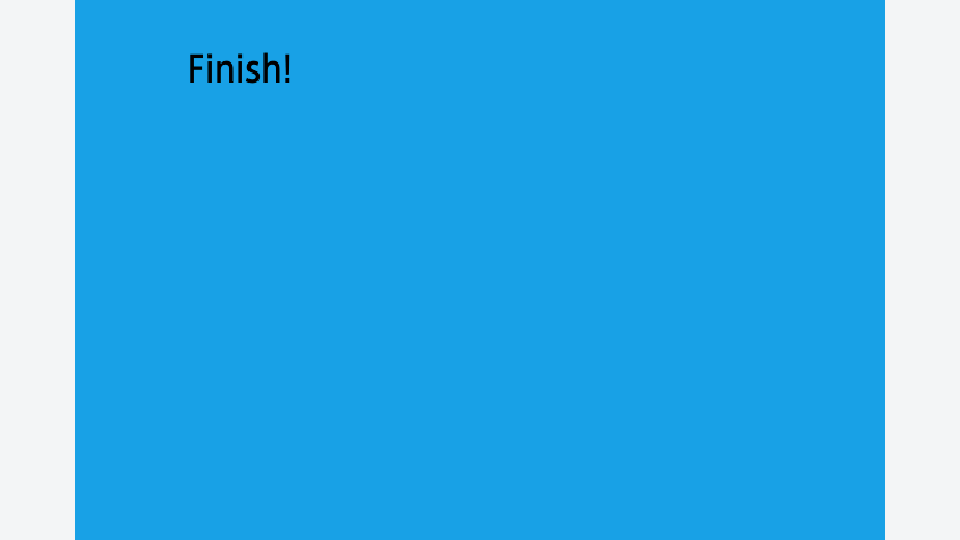
centerText.setText("Finish!");
} else {
centerText.setText(String.valueOf(count));
timerHandler.reset();
}
}
});
scene.registerUpdateHandler(timerHandler);
}
}
2.「Ctrl+Shift+F」を押し、コードをフォーマッティング。