最近の更新

ラベル Android Wear の投稿を表示しています。 すべての投稿を表示

2014年9月10日水曜日

Android Wearでウォッチフェイスをスリープ時に変更する方法

【目的】
Android Wearでウォッチフェイスのスリープ時の表示を変更します。
※ウォッチフェイスとは時計デバイスで表示されるメインの時計画面です。


【準備】
1.「Extrasライブラリ(Android Support Library v20等)のアップデート」の手順で、「Android Support Library」をv20に更新しておきます。
2.「wearable 1.0.0のライブラリプロジェクトの作成方法」の手順で、「wearable 1.0.0」のライブラリプロジェクトを作成しておきます。
※ADT23.0.2ではAndroid Wearに対応していない為の、暫定処置です。

※実機でデバッグする場合には以下を実行しておきます。
Sumsung Gear LiveのADBドライバのインストール方法」の手順で、ADBドライバをインストールしておきます。


【手順1】
1.「Androidプロジェクトの作成・実行方法(バージョン別一覧)」のAndroidプロジェクトの作成手順で、「AndroidWearSample16-002-WatchFaceSleepChange」といプロジェクトを作成。
※プロジェクトの設定は以下の通り。
※他の項目は任意。
項目名 項目に設定する値
アプリケーション名(Application Name) com.example.androidwearsample16_002
プロジェクト名(Project Name) AndroidWearSample16-002-WatchFaceSleepChange
パッケージ名(Package Name) com.example.androidwearsample16_002
Build SDK API 20
Minimum Required SDK API 20

2.「wearable 1.0.0プロジェクトをライブラリに指定する方法」の手順で、wearable 1.0.0をライブラリ設定しておきます。
3.「android-support-v13.jarをライブラリに設定する方法」の手順で、android-support-v13.jarをライブラリ設定しておきます。


【手順2】
1.「AndroidManifest.xml」は以下の通り。
<manifest xmlns:android="http://schemas.android.com/apk/res/android"
    package="com.example.androidwearsample16_002"
    android:versionCode="1"
    android:versionName="1.0" >

    <uses-feature android:name="android.hardware.type.watch" />

    <uses-sdk
        android:minSdkVersion="20"
        android:targetSdkVersion="20" />

    <application
        android:allowBackup="true"
        android:icon="@drawable/ic_launcher"
        android:theme="@android:style/Theme.DeviceDefault.Light" >
        <activity
            android:name="com.example.androidwearsample16_002.MainActivity"
            android:allowEmbedded="true"
            android:label="サンプル時計2" >
            <meta-data
                android:name="com.google.android.clockwork.home.preview"
                android:resource="@drawable/ic_launcher" />

            <intent-filter>
                <action android:name="android.intent.action.MAIN" />

                <category android:name="com.google.android.clockwork.home.category.HOME_BACKGROUND" />
            </intent-filter>
        </activity>
    </application>

</manifest>
2.「Ctrl+Shift+F」を押し、コードをフォーマッティング。
3.「Ctrl+S」を押し、ファイルを保存。


【手順3】
1.「res/layout/activity_main.xml」は以下の通り。
<LinearLayout xmlns:android="http://schemas.android.com/apk/res/android"
    android:layout_width="match_parent"
    android:layout_height="match_parent"
    android:background="@color/black"
    android:orientation="vertical" >

    <TextView
        android:id="@+id/time"
        android:layout_width="match_parent"
        android:layout_height="0dp"
        android:layout_weight="1"
        android:gravity="center_vertical|center_horizontal"
        android:textColor="@color/white"
        android:textSize="50sp" />

    <TextView
        android:id="@+id/status"
        android:layout_width="match_parent"
        android:layout_height="wrap_content"
        android:gravity="center_vertical|center_horizontal"
        android:textColor="@color/white"
        android:textSize="20sp" />

</LinearLayout>
2.「Ctrl+Shift+F」を押し、コードをフォーマッティング。
3.「Ctrl+S」を押し、ファイルを保存。


【手順4】
1.「src/com/example/androidwearsample16_002/MainActivity.java」は以下の通り。
package com.example.androidwearsample16_002;

import java.text.SimpleDateFormat;
import java.util.Calendar;
import java.util.Locale;

import android.app.Activity;
import android.content.BroadcastReceiver;
import android.content.Context;
import android.content.Intent;
import android.content.IntentFilter;
import android.graphics.Color;
import android.os.Bundle;
import android.widget.TextView;

public class MainActivity extends Activity {
    private final static IntentFilter INTENT_FILTER;
    private TextView textViewTime;
    private TextView textViewStatus;

    static {
        INTENT_FILTER = new IntentFilter();
        INTENT_FILTER.addAction(Intent.ACTION_TIME_TICK);
        INTENT_FILTER.addAction(Intent.ACTION_TIMEZONE_CHANGED);
        INTENT_FILTER.addAction(Intent.ACTION_TIME_CHANGED);
    }

    @Override
    protected void onCreate(Bundle savedInstanceState) {
        super.onCreate(savedInstanceState);
        setContentView(R.layout.activity_main);
        textViewTime = (TextView) findViewById(R.id.time);
        textViewStatus = (TextView) findViewById(R.id.status);
        setTextView();
        registerReceiver(timeReceiver, INTENT_FILTER);
    }

    @Override
    protected void onPause() {
        super.onPause();
        textViewTime.setTextColor(Color.YELLOW);
        textViewStatus.setTextColor(Color.YELLOW);
        textViewStatus.setText("onPause");
    }

    @Override
    protected void onResume() {
        super.onResume();
        textViewTime.setTextColor(Color.WHITE);
        textViewStatus.setTextColor(Color.WHITE);
        textViewStatus.setText("onResume");
    }

    @Override
    protected void onDestroy() {
        super.onDestroy();
        unregisterReceiver(timeReceiver);
    }

    private void setTextView() {
        this.textViewTime.setText(new SimpleDateFormat("HH:mm", Locale.JAPANESE).format(Calendar.getInstance().getTime()));
    }

    private BroadcastReceiver timeReceiver = new BroadcastReceiver() {
        @Override
        public void onReceive(Context context, Intent intent) {
            setTextView();
        }
    };
}
2.「Ctrl+Shift+F」を押し、コードをフォーマッティング。
3.「Ctrl+S」を押し、ファイルを保存。


【手順5】
1.「Androidプロジェクトの作成・実行方法(バージョン別一覧)」のAndroidプロジェクトの実行手順で、実行。
※Android Wearの実機で動かす場合は、実機とPCをUSBで接続する。


【手順6】
1.まずは、現在表示されている時計画面を長押して、ウォッチフェイスの選択モードにします。
※Sumsung Gear Live(Android Wear)で試しています。


2.左右にスワイプさせると上記で作成・インストールしたウォッチフェイスがあるので、選択。


3.アクティブ時には、以下の様に表示されます。


4.スリープ時、以下の様に表示されます。


以上です。

2014年9月8日月曜日

Android WearのViewPagerでページのインジケータを表示する方法

【目的】
Android WearのViewPagerでページにインジケータを表示させます。


【準備】
1.「Extrasライブラリ(Android Support Library v20等)のアップデート」の手順で、「Android Support Library」をv20に更新しておきます。
2.「wearable 1.0.0のライブラリプロジェクトの作成方法」の手順で、「wearable 1.0.0」のライブラリプロジェクトを作成しておきます。
※ADT23.0.2ではAndroid Wearに対応していない為の、暫定処置です。

※実機でデバッグする場合には以下を実行しておきます。
Sumsung Gear LiveのADBドライバのインストール方法」の手順で、ADBドライバをインストールしておきます。


【手順1】
1.「Androidプロジェクトの作成・実行方法(バージョン別一覧)」のAndroidプロジェクトの作成手順で、「AndroidWearSample15-003-ViewPagerIndicator」といプロジェクトを作成。
※プロジェクトの設定は以下の通り。
※他の項目は任意。
項目名 項目に設定する値
アプリケーション名(Application Name) com.example.androidwearsample15_003
プロジェクト名(Project Name) AndroidWearSample15-003-ViewPagerIndicator
パッケージ名(Package Name) com.example.androidwearsample15_003
Build SDK API 20
Minimum Required SDK API 20

2.「wearable 1.0.0プロジェクトをライブラリに指定する方法」の手順で、wearable 1.0.0をライブラリ設定しておきます。
3.「android-support-v13.jarをライブラリに設定する方法」の手順で、android-support-v13.jarをライブラリ設定しておきます。


【手順2】
1.「AndroidManifest.xml」は以下の通り。
<manifest xmlns:android="http://schemas.android.com/apk/res/android"
    package="com.example.androidwearsample15_003"
    android:versionCode="1"
    android:versionName="1.0" >

    <uses-sdk
        android:minSdkVersion="20"
        android:targetSdkVersion="20" />

    <application
        android:allowBackup="true"
        android:icon="@drawable/ic_launcher"
        android:theme="@android:style/Theme.DeviceDefault.Light" >
        <activity android:name="com.example.androidwearsample15_003.MainActivity" >
            <intent-filter>
                <action android:name="android.intent.action.MAIN" />

                <category android:name="android.intent.category.LAUNCHER" />
            </intent-filter>
        </activity>
    </application>

</manifest>
2.「Ctrl+Shift+F」を押し、コードをフォーマッティング。
3.「Ctrl+S」を押し、ファイルを保存。


【手順3】
1.「res/layout/activity_main.xml」は以下の通り。
<RelativeLayout xmlns:android="http://schemas.android.com/apk/res/android"
    android:layout_width="match_parent"
    android:layout_height="match_parent"
    android:background="@color/white" >

    <android.support.v4.view.ViewPager
        android:id="@+id/pager"
        android:layout_width="match_parent"
        android:layout_height="match_parent"
        android:background="#000" />

    <LinearLayout
        android:layout_width="wrap_content"
        android:layout_height="wrap_content"
        android:layout_alignParentBottom="true"
        android:layout_centerHorizontal="true"
        android:layout_marginBottom="10dp" >

        <ImageView
            android:id="@+id/indicator1"
            android:layout_width="wrap_content"
            android:layout_height="wrap_content"
            android:layout_marginRight="5dp"
            android:src="@drawable/full" />

        <ImageView
            android:id="@+id/indicator2"
            android:layout_width="wrap_content"
            android:layout_height="wrap_content"
            android:layout_marginRight="5dp"
            android:src="@drawable/empty" />

        <ImageView
            android:id="@+id/indicator3"
            android:layout_width="wrap_content"
            android:layout_height="wrap_content"
            android:src="@drawable/empty" />
    </LinearLayout>

</RelativeLayout>
2.「Ctrl+Shift+F」を押し、コードをフォーマッティング。
3.「Ctrl+S」を押し、ファイルを保存。


【手順4】
1.「任意のファイルの作成方法」の手順で「res/layout/fragment_sample.xml」を作成。
2.「res/layout/fragment_sample.xml」は以下の通り。
<LinearLayout xmlns:android="http://schemas.android.com/apk/res/android"
    android:layout_width="match_parent"
    android:layout_height="match_parent"
    android:background="@color/white"
    android:orientation="vertical" >

    <TextView
        android:id="@+id/text"
        android:layout_width="fill_parent"
        android:layout_height="wrap_content" />

    <Button
        android:layout_width="wrap_content"
        android:layout_height="wrap_content"
        android:text="ボタン" />

</LinearLayout>
3.「Ctrl+Shift+F」を押し、コードをフォーマッティング。
4.「Ctrl+S」を押し、ファイルを保存。


【手順5】
1.「任意のディレクトリの作成方法」の手順で「res/drawable」ディレクトリを作成。
2.以下の画像を「empty.png」という名前で保存。


3.以下の画像を「full.png」という名前で保存。


【手順6】
1.「src/com/example/androidwearsample15_003/MainActivity.java」は以下の通り。
package com.example.androidwearsample15_003;

import java.util.ArrayList;
import java.util.List;

import android.app.Activity;
import android.app.Fragment;
import android.app.FragmentManager;
import android.os.Bundle;
import android.support.v13.app.FragmentPagerAdapter;
import android.support.v4.view.ViewPager;
import android.widget.ImageView;

public class MainActivity extends Activity {
    private ViewPager viewPager;
    private ImageView indicator1;
    private ImageView indicator2;
    private ImageView indicator3;

    @Override
    protected void onCreate(Bundle savedInstanceState) {
        super.onCreate(savedInstanceState);
        setContentView(R.layout.activity_main);
        viewPager = (ViewPager) findViewById(R.id.pager);
        indicator1 = (ImageView) findViewById(R.id.indicator1);
        indicator2 = (ImageView) findViewById(R.id.indicator2);
        indicator3 = (ImageView) findViewById(R.id.indicator3);
        PagerAdapter adapter = new PagerAdapter(getFragmentManager());
        adapter.addFragment(new SampleFragment(1));
        adapter.addFragment(new SampleFragment(2));
        adapter.addFragment(new SampleFragment(3));
        setIndicator(1);
        viewPager.setOnPageChangeListener(new ViewPager.OnPageChangeListener() {
            @Override
            public void onPageSelected(int i) {
                setIndicator(i + 1);
            }

            @Override
            public void onPageScrolled(int i, float f, int j) {
            }

            @Override
            public void onPageScrollStateChanged(int i) {
            }
        });

        viewPager.setAdapter(adapter);

    }

    private void setIndicator(int i) {
        switch (i) {
            case 1:
                indicator1.setImageResource(R.drawable.full);
                indicator2.setImageResource(R.drawable.empty);
                indicator3.setImageResource(R.drawable.empty);
                break;
            case 2:
                indicator1.setImageResource(R.drawable.empty);
                indicator2.setImageResource(R.drawable.full);
                indicator3.setImageResource(R.drawable.empty);
                break;
            case 3:
                indicator1.setImageResource(R.drawable.empty);
                indicator2.setImageResource(R.drawable.empty);
                indicator3.setImageResource(R.drawable.full);
                break;
            default:
                break;
        }
    }

    private class PagerAdapter extends FragmentPagerAdapter {
        List<Fragment> fragmentList = null;

        public PagerAdapter(FragmentManager fragmentManager) {
            super(fragmentManager);
            fragmentList = new ArrayList<Fragment>();
        }

        @Override
        public Fragment getItem(int position) {
            return fragmentList.get(position);
        }

        @Override
        public int getCount() {
            return fragmentList.size();
        }

        public void addFragment(Fragment fragment) {
            fragmentList.add(fragment);
            notifyDataSetChanged();
        }
    }
}
2.「Ctrl+Shift+F」を押し、コードをフォーマッティング。
3.「Ctrl+S」を押し、ファイルを保存。


【手順7】
1.「任意のファイルの作成方法」の手順で「src/com/example/androidwearsample15_003/SampleFragment.java」を作成。
2.「src/com/example/androidwearsample15_003/SampleFragment.java」は以下の通り。
package com.example.androidwearsample15_003;

import android.app.Fragment;
import android.os.Bundle;
import android.view.LayoutInflater;
import android.view.View;
import android.view.ViewGroup;
import android.widget.TextView;

public class SampleFragment extends Fragment {
    private int pageNo;

    public SampleFragment(int pageNo) {
        this.pageNo = pageNo;
    }

    @Override
    public View onCreateView(LayoutInflater inflater, ViewGroup container, Bundle savedInstanceState) {
        View view = inflater.inflate(R.layout.fragment_sample, container, false);
        ((TextView) view.findViewById(R.id.text)).setText(pageNo + "ページ目");
        return view;
    }
}
3.「Ctrl+Shift+F」を押し、コードをフォーマッティング。
4.「Ctrl+S」を押し、ファイルを保存。


【手順8】
1.「Androidプロジェクトの作成・実行方法(バージョン別一覧)」のAndroidプロジェクトの実行手順で、実行。
※Android Wearの実機で動かす場合は、実機とPCをUSBで接続する。


【手順9】
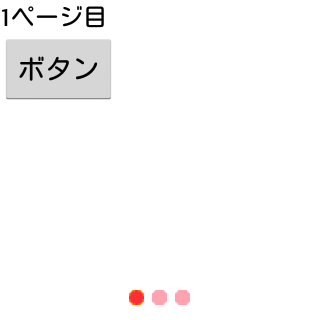
1.Sumsung Gear Live(Android Wear)の場合、以下の様に表示されます。


2.2ページ目です。


以上です。

Android WearのGridViewPagerでページのインジケータを表示する方法

【目的】
Android WearのGridViewPagerで個別レイアウトのページにインジケータを表示させます。


【準備】
1.「Extrasライブラリ(Android Support Library v20等)のアップデート」の手順で、「Android Support Library」をv20に更新しておきます。
2.「wearable 1.0.0のライブラリプロジェクトの作成方法」の手順で、「wearable 1.0.0」のライブラリプロジェクトを作成しておきます。
※ADT23.0.2ではAndroid Wearに対応していない為の、暫定処置です。

※実機でデバッグする場合には以下を実行しておきます。
Sumsung Gear LiveのADBドライバのインストール方法」の手順で、ADBドライバをインストールしておきます。


【手順1】
1.「Androidプロジェクトの作成・実行方法(バージョン別一覧)」のAndroidプロジェクトの作成手順で、「AndroidWearSample14-003-GridViewPagerIndicator」といプロジェクトを作成。
※プロジェクトの設定は以下の通り。
※他の項目は任意。
項目名 項目に設定する値
アプリケーション名(Application Name) com.example.androidwearsample14_003
プロジェクト名(Project Name) AndroidWearSample14-003-GridViewPagerIndicator
パッケージ名(Package Name) com.example.androidwearsample14_003
Build SDK API 20
Minimum Required SDK API 20

2.「wearable 1.0.0プロジェクトをライブラリに指定する方法」の手順で、wearable 1.0.0をライブラリ設定しておきます。
3.「android-support-v13.jarをライブラリに設定する方法」の手順で、android-support-v13.jarをライブラリ設定しておきます。


【手順2】
1.「AndroidManifest.xml」は以下の通り。
<manifest xmlns:android="http://schemas.android.com/apk/res/android"
    package="com.example.androidwearsample14_003"
    android:versionCode="1"
    android:versionName="1.0" >

    <uses-sdk
        android:minSdkVersion="20"
        android:targetSdkVersion="20" />

    <application
        android:allowBackup="true"
        android:icon="@drawable/ic_launcher"
        android:theme="@android:style/Theme.DeviceDefault.Light" >
        <activity android:name="com.example.androidwearsample14_003.MainActivity" >
            <intent-filter>
                <action android:name="android.intent.action.MAIN" />

                <category android:name="android.intent.category.LAUNCHER" />
            </intent-filter>
        </activity>
    </application>

</manifest>
2.「Ctrl+Shift+F」を押し、コードをフォーマッティング。
3.「Ctrl+S」を押し、ファイルを保存。


【手順3】
1.「res/layout/activity_main.xml」は以下の通り。
<RelativeLayout xmlns:android="http://schemas.android.com/apk/res/android"
    android:layout_width="match_parent"
    android:layout_height="match_parent"
    android:background="@color/white" >

    <android.support.wearable.view.GridViewPager
        android:id="@+id/fragment_container"
        android:layout_width="match_parent"
        android:layout_height="match_parent" />

    <LinearLayout
        android:layout_width="wrap_content"
        android:layout_height="wrap_content"
        android:layout_alignParentBottom="true"
        android:layout_centerHorizontal="true"
        android:layout_marginBottom="10dp" >

        <ImageView
            android:id="@+id/indicator1"
            android:layout_width="wrap_content"
            android:layout_height="wrap_content"
            android:layout_marginRight="5dp"
            android:src="@drawable/full" />

        <ImageView
            android:id="@+id/indicator2"
            android:layout_width="wrap_content"
            android:layout_height="wrap_content"
            android:layout_marginRight="5dp"
            android:src="@drawable/empty" />

        <ImageView
            android:id="@+id/indicator3"
            android:layout_width="wrap_content"
            android:layout_height="wrap_content"
            android:src="@drawable/empty" />
    </LinearLayout>

</RelativeLayout>
2.「Ctrl+Shift+F」を押し、コードをフォーマッティング。
3.「Ctrl+S」を押し、ファイルを保存。


【手順4】
1.「任意のファイルの作成方法」の手順で「res/layout/fragment_column1.xml」を作成。
2.「res/layout/fragment_column1.xml」は以下の通り。
<LinearLayout xmlns:android="http://schemas.android.com/apk/res/android"
    android:layout_width="match_parent"
    android:layout_height="match_parent"
    android:background="@color/white"
    android:orientation="vertical" >

    <TextView
        android:layout_width="fill_parent"
        android:layout_height="wrap_content"
        android:text="1列目" />

    <TextView
        android:id="@+id/text"
        android:layout_width="fill_parent"
        android:layout_height="wrap_content" />

</LinearLayout>
3.「Ctrl+Shift+F」を押し、コードをフォーマッティング。
4.「Ctrl+S」を押し、ファイルを保存。


【手順5】
1.「任意のファイルの作成方法」の手順で「res/layout/fragment_column2.xml」を作成。
2.「res/layout/fragment_column2.xml」は以下の通り。
<LinearLayout xmlns:android="http://schemas.android.com/apk/res/android"
    android:layout_width="match_parent"
    android:layout_height="match_parent"
    android:background="@color/orange"
    android:orientation="vertical" >

    <TextView
        android:layout_width="fill_parent"
        android:layout_height="wrap_content"
        android:text="2列目" />

    <TextView
        android:id="@+id/text"
        android:layout_width="fill_parent"
        android:layout_height="wrap_content" />

</LinearLayout>
3.「Ctrl+Shift+F」を押し、コードをフォーマッティング。
4.「Ctrl+S」を押し、ファイルを保存。


【手順6】
1.「任意のファイルの作成方法」の手順で「res/layout/fragment_column3.xml」を作成。
2.「res/layout/fragment_column3.xml」は以下の通り。
<LinearLayout xmlns:android="http://schemas.android.com/apk/res/android"
    android:layout_width="match_parent"
    android:layout_height="match_parent"
    android:background="@color/light_grey"
    android:orientation="vertical" >

    <TextView
        android:layout_width="fill_parent"
        android:layout_height="wrap_content"
        android:text="3列目" />

    <TextView
        android:id="@+id/text"
        android:layout_width="fill_parent"
        android:layout_height="wrap_content" />

</LinearLayout>
3.「Ctrl+Shift+F」を押し、コードをフォーマッティング。
4.「Ctrl+S」を押し、ファイルを保存。


【手順7】
1.「任意のディレクトリの作成方法」の手順で「res/drawable」ディレクトリを作成。
2.以下の画像を「empty.png」という名前で保存。


3.以下の画像を「full.png」という名前で保存。


【手順8】
1.「src/com/example/androidwearsample14_003/MainActivity.java」は以下の通り。
package com.example.androidwearsample14_003;

import android.app.Activity;
import android.app.Fragment;
import android.app.FragmentManager;
import android.os.Bundle;
import android.support.wearable.view.FragmentGridPagerAdapter;
import android.support.wearable.view.GridViewPager;
import android.widget.ImageView;

import com.example.androidwearsample14_003.R;

public class MainActivity extends Activity {
    private static final int NUMBER_ROW = 3;
    private static final int NUMBER_COL = 3;

    private MainAdapter mainAdapter;
    private GridViewPager gridViewPager;
    private ImageView indicator1;
    private ImageView indicator2;
    private ImageView indicator3;

    @Override
    protected void onCreate(Bundle savedInstanceState) {
        super.onCreate(savedInstanceState);
        setContentView(R.layout.activity_main);
        gridViewPager = (GridViewPager) findViewById(R.id.fragment_container);
        indicator1 = (ImageView) findViewById(R.id.indicator1);
        indicator2 = (ImageView) findViewById(R.id.indicator2);
        indicator3 = (ImageView) findViewById(R.id.indicator3);
        gridViewPager.setOnPageChangeListener(new GridViewPager.OnPageChangeListener() {
            @Override
            public void onPageScrollStateChanged(int i) {
            }

            @Override
            public void onPageScrolled(int i, int j, float f, float f1, int k, int l) {
            }

            @Override
            public void onPageSelected(int i, int j) {
                setIndicator(j + 1);
            }
        });
        mainAdapter = new MainAdapter(getFragmentManager());
        gridViewPager.setAdapter(mainAdapter);
    }

    private void setIndicator(int i) {
        switch (i) {
            case 1:
                indicator1.setImageResource(R.drawable.full);
                indicator2.setImageResource(R.drawable.empty);
                indicator3.setImageResource(R.drawable.empty);
                break;
            case 2:
                indicator1.setImageResource(R.drawable.empty);
                indicator2.setImageResource(R.drawable.full);
                indicator3.setImageResource(R.drawable.empty);
                break;
            case 3:
                indicator1.setImageResource(R.drawable.empty);
                indicator2.setImageResource(R.drawable.empty);
                indicator3.setImageResource(R.drawable.full);
                break;
            default:
                break;
        }
    }

    private static class MainAdapter extends FragmentGridPagerAdapter {
        public MainAdapter(FragmentManager fragmentManager) {
            super(fragmentManager);
        }

        @Override
        public int getRowCount() {
            return NUMBER_ROW;
        }

        @Override
        public int getColumnCount(int row) {
            return NUMBER_COL;
        }

        @Override
        public Fragment getFragment(int row, int column) {
            if (column == 0) {
                return new Column1Fragment(row);
            } else if (column == 1) {
                return new Column2Fragment(row);
            } else {
                return new Column3Fragment(row);
            }
        }
    }
}
2.「Ctrl+Shift+F」を押し、コードをフォーマッティング。
3.「Ctrl+S」を押し、ファイルを保存。


【手順8】
1.「任意のファイルの作成方法」の手順で「src/com/example/androidwearsample14_003/Column1Fragment.java」を作成。
2.「src/com/example/androidwearsample14_003/Column1Fragment.java」は以下の通り。
package com.example.androidwearsample14_003;

import android.app.Fragment;
import android.os.Bundle;
import android.view.LayoutInflater;
import android.view.View;
import android.view.ViewGroup;
import android.widget.TextView;

public class Column1Fragment extends Fragment {
    private int row;

    public Column1Fragment(int row) {
        this.row = row;
    }

    @Override
    public View onCreateView(LayoutInflater inflater, ViewGroup container, Bundle savedInstanceState) {
        View view = inflater.inflate(R.layout.fragment_column1, container, false);
        ((TextView) view.findViewById(R.id.text)).setText((row + 1) + "行目");
        return view;
    }
}
3.「Ctrl+Shift+F」を押し、コードをフォーマッティング。
4.「Ctrl+S」を押し、ファイルを保存。


【手順9】
1.「任意のファイルの作成方法」の手順で「src/com/example/androidwearsample14_003/Column2Fragment.java」を作成。
2.「src/com/example/androidwearsample14_003/Column2Fragment.java」は以下の通り。
package com.example.androidwearsample14_003;

import android.app.Fragment;
import android.os.Bundle;
import android.view.LayoutInflater;
import android.view.View;
import android.view.ViewGroup;
import android.widget.TextView;

public class Column2Fragment extends Fragment {
    private int row;

    public Column2Fragment(int row) {
        this.row = row;
    }

    @Override
    public View onCreateView(LayoutInflater inflater, ViewGroup container, Bundle savedInstanceState) {
        View view = inflater.inflate(R.layout.fragment_column2, container, false);
        ((TextView) view.findViewById(R.id.text)).setText((row + 1) + "行目");
        return view;
    }
}
3.「Ctrl+Shift+F」を押し、コードをフォーマッティング。
4.「Ctrl+S」を押し、ファイルを保存。


【手順10】
1.「任意のファイルの作成方法」の手順で「src/com/example/androidwearsample14_003/Column3Fragment.java」を作成。
2.「src/com/example/androidwearsample14_003/Column3Fragment.java」は以下の通り。
package com.example.androidwearsample14_003;

import android.app.Fragment;
import android.os.Bundle;
import android.view.LayoutInflater;
import android.view.View;
import android.view.ViewGroup;
import android.widget.TextView;

import com.example.androidwearsample14_003.R;

public class Column3Fragment extends Fragment {
    private int row;

    public Column3Fragment(int row) {
        this.row = row;
    }

    @Override
    public View onCreateView(LayoutInflater inflater, ViewGroup container, Bundle savedInstanceState) {
        View view = inflater.inflate(R.layout.fragment_column3, container, false);
        ((TextView) view.findViewById(R.id.text)).setText((row + 1) + "行目");
        return view;
    }
}
3.「Ctrl+Shift+F」を押し、コードをフォーマッティング。
4.「Ctrl+S」を押し、ファイルを保存。


【手順11】
1.「Androidプロジェクトの作成・実行方法(バージョン別一覧)」のAndroidプロジェクトの実行手順で、実行。
※Android Wearの実機で動かす場合は、実機とPCをUSBで接続する。


【手順12】
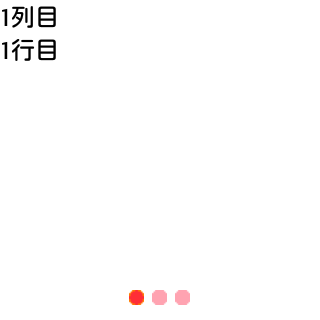
1.Sumsung Gear Live(Android Wear)の場合、以下の様に表示されます。


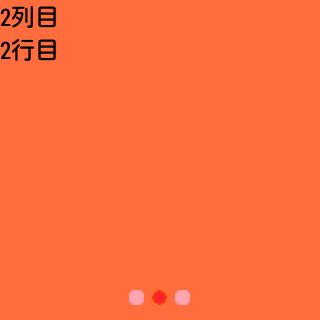
2.2列目の表示。


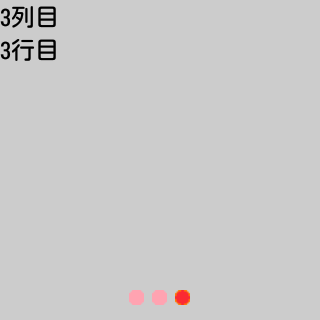
3.3列目の表示。


以上です。

Android WearのGridViewPagerで個別のレイアウトページを表示する方法

【目的】
Android WearのGridViewPagerで個別レイアウトのページ表示させます。


【準備】
1.「Extrasライブラリ(Android Support Library v20等)のアップデート」の手順で、「Android Support Library」をv20に更新しておきます。
2.「wearable 1.0.0のライブラリプロジェクトの作成方法」の手順で、「wearable 1.0.0」のライブラリプロジェクトを作成しておきます。
※ADT23.0.2ではAndroid Wearに対応していない為の、暫定処置です。

※実機でデバッグする場合には以下を実行しておきます。
Sumsung Gear LiveのADBドライバのインストール方法」の手順で、ADBドライバをインストールしておきます。


【手順1】
1.「Androidプロジェクトの作成・実行方法(バージョン別一覧)」のAndroidプロジェクトの作成手順で、「AndroidWearSample14-002-GridViewPagerFragment」といプロジェクトを作成。
※プロジェクトの設定は以下の通り。
※他の項目は任意。
項目名 項目に設定する値
アプリケーション名(Application Name) com.example.androidwearsample14_002
プロジェクト名(Project Name) AndroidWearSample14-002-GridViewPagerFragment
パッケージ名(Package Name) com.example.androidwearsample14_002
Build SDK API 20
Minimum Required SDK API 20

2.「wearable 1.0.0プロジェクトをライブラリに指定する方法」の手順で、wearable 1.0.0をライブラリ設定しておきます。
3.「android-support-v13.jarをライブラリに設定する方法」の手順で、android-support-v13.jarをライブラリ設定しておきます。


【手順2】
1.「AndroidManifest.xml」は以下の通り。
<manifest xmlns:android="http://schemas.android.com/apk/res/android"
    package="com.example.androidwearsample14_002"
    android:versionCode="1"
    android:versionName="1.0" >

    <uses-sdk
        android:minSdkVersion="20"
        android:targetSdkVersion="20" />

    <application
        android:allowBackup="true"
        android:icon="@drawable/ic_launcher"
        android:theme="@android:style/Theme.DeviceDefault.Light" >
        <activity android:name="com.example.androidwearsample14_002.MainActivity" >
            <intent-filter>
                <action android:name="android.intent.action.MAIN" />

                <category android:name="android.intent.category.LAUNCHER" />
            </intent-filter>
        </activity>
    </application>

</manifest>
2.「Ctrl+Shift+F」を押し、コードをフォーマッティング。
3.「Ctrl+S」を押し、ファイルを保存。


【手順3】
1.「res/layout/activity_main.xml」は以下の通り。
<android.support.wearable.view.GridViewPager xmlns:android="http://schemas.android.com/apk/res/android"
    android:id="@+id/fragment_container"
    android:layout_width="match_parent"
    android:layout_height="match_parent" />
2.「Ctrl+Shift+F」を押し、コードをフォーマッティング。
3.「Ctrl+S」を押し、ファイルを保存。


【手順4】
1.「任意のファイルの作成方法」の手順で「res/layout/fragment_column1.xml」を作成。
2.「res/layout/fragment_column1.xml」は以下の通り。
<LinearLayout xmlns:android="http://schemas.android.com/apk/res/android"
    android:layout_width="match_parent"
    android:layout_height="match_parent"
    android:background="@color/white"
    android:orientation="vertical" >

    <TextView
        android:layout_width="fill_parent"
        android:layout_height="wrap_content"
        android:text="1列目" />

    <TextView
        android:id="@+id/text"
        android:layout_width="fill_parent"
        android:layout_height="wrap_content" />

</LinearLayout>
3.「Ctrl+Shift+F」を押し、コードをフォーマッティング。
4.「Ctrl+S」を押し、ファイルを保存。


【手順5】
1.「任意のファイルの作成方法」の手順で「res/layout/fragment_column2.xml」を作成。
2.「res/layout/fragment_column2.xml」は以下の通り。
<LinearLayout xmlns:android="http://schemas.android.com/apk/res/android"
    android:layout_width="match_parent"
    android:layout_height="match_parent"
    android:background="@color/orange"
    android:orientation="vertical" >

    <TextView
        android:layout_width="fill_parent"
        android:layout_height="wrap_content"
        android:text="2列目" />

    <TextView
        android:id="@+id/text"
        android:layout_width="fill_parent"
        android:layout_height="wrap_content" />

</LinearLayout>
3.「Ctrl+Shift+F」を押し、コードをフォーマッティング。
4.「Ctrl+S」を押し、ファイルを保存。


【手順6】
1.「src/com/example/androidwearsample14_002/MainActivity.java」は以下の通り。
package com.example.androidwearsample14_002;

import android.app.Activity;
import android.app.Fragment;
import android.app.FragmentManager;
import android.os.Bundle;
import android.support.wearable.view.FragmentGridPagerAdapter;
import android.support.wearable.view.GridViewPager;

public class MainActivity extends Activity {
    private static final int NUMBER_ROW = 3;
    private static final int NUMBER_COL = 2;

    private MainAdapter mainAdapter;
    private GridViewPager gridViewPager;

    @Override
    protected void onCreate(Bundle savedInstanceState) {
        super.onCreate(savedInstanceState);
        setContentView(R.layout.activity_main);
        gridViewPager = (GridViewPager) findViewById(R.id.fragment_container);
        mainAdapter = new MainAdapter(getFragmentManager());
        gridViewPager.setAdapter(mainAdapter);

    }

    private static class MainAdapter extends FragmentGridPagerAdapter {
        public MainAdapter(FragmentManager fragmentManager) {
            super(fragmentManager);
        }

        @Override
        public int getRowCount() {
            return NUMBER_ROW;
        }

        @Override
        public int getColumnCount(int row) {
            return NUMBER_COL;
        }

        @Override
        public Fragment getFragment(int row, int column) {
            if (column == 0) {
                return new Column1Fragment(row);
            } else {
                return new Column2Fragment(row);
            }
        }
    }
}
2.「Ctrl+Shift+F」を押し、コードをフォーマッティング。
3.「Ctrl+S」を押し、ファイルを保存。


【手順7】
1.「任意のファイルの作成方法」の手順で「src/com/example/androidwearsample14_002/Column1Fragment.java」を作成。
2.「src/com/example/androidwearsample14_002/Column1Fragment.java」は以下の通り。
package com.example.androidwearsample14_002;

import android.app.Fragment;
import android.os.Bundle;
import android.view.LayoutInflater;
import android.view.View;
import android.view.ViewGroup;
import android.widget.TextView;

public class Column1Fragment extends Fragment {
    private int row;

    public Column1Fragment(int row) {
        this.row = row;
    }

    @Override
    public View onCreateView(LayoutInflater inflater, ViewGroup container, Bundle savedInstanceState) {
        View view = inflater.inflate(R.layout.fragment_column1, container, false);
        ((TextView) view.findViewById(R.id.text)).setText((row + 1) + "行目");
        return view;
    }
}
3.「Ctrl+Shift+F」を押し、コードをフォーマッティング。
4.「Ctrl+S」を押し、ファイルを保存。


【手順8】
1.「任意のファイルの作成方法」の手順で「src/com/example/androidwearsample14_002/Column2Fragment.java」を作成。
2.「src/com/example/androidwearsample14_002/Column2Fragment.java」は以下の通り。
package com.example.androidwearsample14_002;

import android.app.Fragment;
import android.os.Bundle;
import android.view.LayoutInflater;
import android.view.View;
import android.view.ViewGroup;
import android.widget.TextView;

public class Column2Fragment extends Fragment {
    private int row;

    public Column2Fragment(int row) {
        this.row = row;
    }

    @Override
    public View onCreateView(LayoutInflater inflater, ViewGroup container, Bundle savedInstanceState) {
        View view = inflater.inflate(R.layout.fragment_column2, container, false);
        ((TextView) view.findViewById(R.id.text)).setText((row + 1) + "行目");
        return view;
    }
}
3.「Ctrl+Shift+F」を押し、コードをフォーマッティング。
4.「Ctrl+S」を押し、ファイルを保存。


【手順9】
1.「Androidプロジェクトの作成・実行方法(バージョン別一覧)」のAndroidプロジェクトの実行手順で、実行。
※Android Wearの実機で動かす場合は、実機とPCをUSBで接続する。


【手順10】
1.Sumsung Gear Live(Android Wear)の場合、以下の様に表示されます。


2.列ごとに異なるレイアウトで表示しています。


以上です。

2014年9月6日土曜日

Android WearでBoxInsetViewを使用する方法

【目的】
Android WearのBoxInsetViewでページ表示させます。


【準備】
1.「Extrasライブラリ(Android Support Library v20等)のアップデート」の手順で、「Android Support Library」をv20に更新しておきます。
2.「wearable 1.0.0のライブラリプロジェクトの作成方法」の手順で、「wearable 1.0.0」のライブラリプロジェクトを作成しておきます。
※ADT23.0.2ではAndroid Wearに対応していない為の、暫定処置です。

※実機でデバッグする場合には以下を実行しておきます。
Sumsung Gear LiveのADBドライバのインストール方法」の手順で、ADBドライバをインストールしておきます。


【手順1】
1.「Androidプロジェクトの作成・実行方法(バージョン別一覧)」のAndroidプロジェクトの作成手順で、「AndroidWearSample18-001-BoxInsetView」といプロジェクトを作成。
※プロジェクトの設定は以下の通り。
※他の項目は任意。
項目名 項目に設定する値
アプリケーション名(Application Name) com.example.androidwearsample18_001
プロジェクト名(Project Name) AndroidWearSample18-001-BoxInsetView
パッケージ名(Package Name) com.example.androidwearsample18_001
Build SDK API 20
Minimum Required SDK API 20

2.「wearable 1.0.0プロジェクトをライブラリに指定する方法」の手順で、wearable 1.0.0をライブラリ設定しておきます。
3.「android-support-v13.jarをライブラリに設定する方法」の手順で、android-support-v13.jarをライブラリ設定しておきます。


【手順2】
1.「AndroidManifest.xml」は以下の通り。
<manifest xmlns:android="http://schemas.android.com/apk/res/android"
    package="com.example.androidwearsample18_001"
    android:versionCode="1"
    android:versionName="1.0" >

    <uses-sdk
        android:minSdkVersion="20"
        android:targetSdkVersion="20" />

    <application
        android:allowBackup="true"
        android:icon="@drawable/ic_launcher"
        android:theme="@android:style/Theme.DeviceDefault.Light" >
        <activity android:name="com.example.androidwearsample18_001.MainActivity" >
            <intent-filter>
                <action android:name="android.intent.action.MAIN" />

                <category android:name="android.intent.category.LAUNCHER" />
            </intent-filter>
        </activity>
    </application>

</manifest>
2.「Ctrl+Shift+F」を押し、コードをフォーマッティング。
3.「Ctrl+S」を押し、ファイルを保存。


【手順3】
1.「res/layout/activity_main.xml」は以下の通り。
<android.support.wearable.view.BoxInsetLayout xmlns:android="http://schemas.android.com/apk/res/android"
    xmlns:app="http://schemas.android.com/apk/res-auto"
    android:layout_width="match_parent"
    android:layout_height="match_parent" >

    <LinearLayout
        android:layout_width="match_parent"
        android:layout_height="match_parent"
        app:layout_box="top"
        android:orientation="vertical" >

        <Button
            android:layout_width="match_parent"
            android:layout_height="wrap_content"
            android:text="あああああいいいいいううううう" />

        <TextView
            android:layout_width="match_parent"
            android:layout_height="wrap_content"
            android:background="@color/dark_blue"
            android:text="あああああいいいいいううううう"
            android:textColor="@color/white" />
    </LinearLayout>

</android.support.wearable.view.BoxInsetLayout>
2.「Ctrl+Shift+F」を押し、コードをフォーマッティング。
3.「Ctrl+S」を押し、ファイルを保存。


【手順4】
1.「src/com/example/androidwearsample18_001/MainActivity.java」は以下の通り。
package com.example.androidwearsample18_001;

import android.app.Activity;
import android.os.Bundle;

import com.example.androidwearsample17_001.R;

public class MainActivity extends Activity {
    @Override
    protected void onCreate(Bundle savedInstanceState) {
        super.onCreate(savedInstanceState);
        setContentView(R.layout.activity_main);
    }
}
2.「Ctrl+Shift+F」を押し、コードをフォーマッティング。
3.「Ctrl+S」を押し、ファイルを保存。


【手順5】
1.「Androidプロジェクトの作成・実行方法(バージョン別一覧)」のAndroidプロジェクトの実行手順で、実行。
※Android Wearの実機で動かす場合は、実機とPCをUSBで接続する。


【手順6】
1.Sumsung Gear Live(Android Wear)の場合、以下の様に表示されます。


2.丸型のエミュレータで表示した場合。
※上部のボタンの角が丸くされています。


以上です。

Android WearでWearableListViewを使用する方法

【目的】
Android WearのWearableListViewでリストを表示させます。


【準備】
1.「Extrasライブラリ(Android Support Library v20等)のアップデート」の手順で、「Android Support Library」をv20に更新しておきます。
2.「wearable 1.0.0のライブラリプロジェクトの作成方法」の手順で、「wearable 1.0.0」のライブラリプロジェクトを作成しておきます。
※ADT23.0.2ではAndroid Wearに対応していない為の、暫定処置です。

※実機でデバッグする場合には以下を実行しておきます。
Sumsung Gear LiveのADBドライバのインストール方法」の手順で、ADBドライバをインストールしておきます。


【手順1】
1.「Androidプロジェクトの作成・実行方法(バージョン別一覧)」のAndroidプロジェクトの作成手順で、「AndroidWearSample17-001-WearableListView」といプロジェクトを作成。
※プロジェクトの設定は以下の通り。
※他の項目は任意。
項目名 項目に設定する値
アプリケーション名(Application Name) com.example.androidwearsample17_001
プロジェクト名(Project Name) AndroidWearSample17-001-WearableListView
パッケージ名(Package Name) com.example.androidwearsample17_001
Build SDK API 20
Minimum Required SDK API 20

2.「wearable 1.0.0プロジェクトをライブラリに指定する方法」の手順で、wearable 1.0.0をライブラリ設定しておきます。
3.「android-support-v13.jarをライブラリに設定する方法」の手順で、android-support-v13.jarをライブラリ設定しておきます。


【手順2】
1.「AndroidManifest.xml」は以下の通り。
<manifest xmlns:android="http://schemas.android.com/apk/res/android"
    package="com.example.androidwearsample17_001"
    android:versionCode="1"
    android:versionName="1.0" >

    <uses-sdk
        android:minSdkVersion="20"
        android:targetSdkVersion="20" />

    <application
        android:allowBackup="true"
        android:icon="@drawable/ic_launcher"
        android:theme="@android:style/Theme.DeviceDefault.Light" >
        <activity android:name="com.example.androidwearsample17_001.MainActivity" >
            <intent-filter>
                <action android:name="android.intent.action.MAIN" />

                <category android:name="android.intent.category.LAUNCHER" />
            </intent-filter>
        </activity>
    </application>

</manifest>
2.「Ctrl+Shift+F」を押し、コードをフォーマッティング。
3.「Ctrl+S」を押し、ファイルを保存。


【手順3】
1.「res/layout/activity_main.xml」は以下の通り。
<android.support.wearable.view.WearableListView xmlns:android="http://schemas.android.com/apk/res/android"
    android:id="@+id/list"
    android:layout_width="match_parent"
    android:layout_height="match_parent" />
2.「Ctrl+Shift+F」を押し、コードをフォーマッティング。
3.「Ctrl+S」を押し、ファイルを保存。


【手順4】
1.「任意のファイルの作成方法」の手順で「res/layout/list_item.xml」を作成。
2.「res/layout/list_item.xml」は以下の通り。
<TextView xmlns:android="http://schemas.android.com/apk/res/android"
    android:id="@+id/name"
    android:layout_width="match_parent"
    android:layout_height="match_parent"
    android:background="@color/dark_blue"
    android:gravity="center_vertical|left"
    android:textColor="@color/white"
    android:textSize="16sp" />
3.「Ctrl+Shift+F」を押し、コードをフォーマッティング。
4.「Ctrl+S」を押し、ファイルを保存。


【手順5】
1.「src/com/example/androidwearsample17_001/MainActivity.java」は以下の通り。
package com.example.androidwearsample17_001;

import java.util.ArrayList;
import java.util.List;

import android.app.Activity;
import android.content.Context;
import android.os.Bundle;
import android.support.wearable.view.WearableListView;
import android.support.wearable.view.WearableListView.ViewHolder;
import android.view.LayoutInflater;
import android.view.ViewGroup;
import android.widget.TextView;
import android.widget.Toast;

public class MainActivity extends Activity implements WearableListView.ClickListener {
    private static List<String> list;

    static {
        list = new ArrayList<String>();
        list.add("aaa");
        list.add("bbb");
        list.add("ccc");
        list.add("ddd");
        list.add("eee");
        list.add("fff");
        list.add("ggg");
    }

    @Override
    protected void onCreate(Bundle savedInstanceState) {
        super.onCreate(savedInstanceState);
        setContentView(R.layout.activity_main);

        WearableListView listView = (WearableListView) findViewById(R.id.list);
        listView.setAdapter(new Adapter(this));
        listView.setClickListener(this);
    }

    @Override
    public void onClick(ViewHolder viewHolder) {
        CharSequence text = ((TextView) viewHolder.itemView.findViewById(R.id.name)).getText();
        Toast.makeText(this, text, Toast.LENGTH_SHORT).show();
    }

    @Override
    public void onTopEmptyRegionClick() {
        Toast.makeText(this, "空です。", Toast.LENGTH_SHORT).show();
    }

    private class Adapter extends WearableListView.Adapter {
        private Context mContext;
        private LayoutInflater mInflater;

        private Adapter(Context context) {
            mContext = context;
            mInflater = LayoutInflater.from(context);
        }

        @Override
        public WearableListView.ViewHolder onCreateViewHolder(ViewGroup parent, int viewType) {
            return new WearableListView.ViewHolder(mInflater.inflate(R.layout.list_item, null));
        }

        @Override
        public void onBindViewHolder(WearableListView.ViewHolder holder, int position) {
            TextView view = (TextView) holder.itemView.findViewById(R.id.name);
            view.setText(list.get(position));
            holder.itemView.setTag(position);
        }

        @Override
        public int getItemCount() {
            return list.size();
        }
    }
}
2.「Ctrl+Shift+F」を押し、コードをフォーマッティング。
3.「Ctrl+S」を押し、ファイルを保存。


【手順6】
1.「Androidプロジェクトの作成・実行方法(バージョン別一覧)」のAndroidプロジェクトの実行手順で、実行。
※Android Wearの実機で動かす場合は、実機とPCをUSBで接続する。


【手順7】
1.Sumsung Gear Live(Android Wear)の場合、以下の様に表示されます。
※WearableListViewは3行固定表示っぽいですね。


2.上部は、空が表示されます。
※空の部分をタップした場合


3.下部にも空が表示されます。


以上です。

2014年8月27日水曜日

Android Wearアプリをインストールするスマホアプリの作成方法

【目的】
Android Wearアプリをインストールするスマホアプリを作成します。
※以下の手順は、ADT23.0.2ではAndroid Wearに対応していない為の、暫定手順です。


【準備】
1.「Android Wearでウォッチフェイスを作成する方法」の手順で、Android Wearアプリを作成しておきます。
2.1.で作成したアプリを『watchface.apk』という名前で署名付きapkでパッケージしておきます。


【手順1】
1.「Androidプロジェクトの作成・実行方法(バージョン別一覧)」のAndroidプロジェクトの作成手順で、「AndroidWearSample16-001-WatchFacePhone」といプロジェクトを作成。
※プロジェクトの設定は以下の通り。
※他の項目は任意。
項目名 項目に設定する値
アプリケーション名(Application Name) com.example.androidwearsample16_001
プロジェクト名(Project Name) AndroidWearSample16-001-WatchFacePhone
パッケージ名(Package Name) com.example.androidwearsample16_001
Build SDK API 19
Minimum Required SDK API 19

2.「Google Play services SDKをライブラリ参照する方法」の手順で、ライブラリを設定。


【手順2】
1.「AndroidManifest.xml」は以下の通り。
<manifest xmlns:android="http://schemas.android.com/apk/res/android"
    package="com.example.androidwearsample16_001"
    android:versionCode="1"
    android:versionName="1.0" >

    <uses-feature android:name="android.hardware.type.watch" />

    <uses-sdk
        android:minSdkVersion="19"
        android:targetSdkVersion="19" />

    <application
        android:allowBackup="true"
        android:icon="@drawable/ic_launcher"
        android:label="ウォッチ"
        android:theme="@android:style/Theme.Holo.Light" >
        <meta-data
            android:name="com.google.android.wearable.beta.app"
            android:resource="@xml/wearable_app_desc" />
        <meta-data
            android:name="com.google.android.gms.version"
            android:value="@integer/google_play_services_version" />
    </application>

</manifest>
2.「Ctrl+Shift+F」を押し、コードをフォーマッティング。
3.「Ctrl+S」を押し、ファイルを保存。


【手順3】
1.【準備】で作成した『watchface.apk』を「/res/raw」ディレクトリに配置。


【手順4】
1.「任意のファイルの作成方法」の手順で「res/xml/wearable_app_desc.xml」を作成。
2.「res/xml/wearable_app_desc.xml」は以下の通り。
<wearableApp package="com.example.androidwearsample16_001">
    <versionCode>1</versionCode>
    <versionName>1.0</versionName>
    <rawPathResId>watchface</rawPathResId>
</wearableApp>
3.「Ctrl+S」を押し、ファイルを保存。


【手順5】
1.「Androidプロジェクトの作成・実行方法(バージョン別一覧)」のAndroidプロジェクトの実行手順で、実行。
※今回はスマホとPCをUSBで接続します。
 スマホアプリのインストール後にペアリングしているWear端末にAndroid Wearアプリが自動的にインストールされます。


【手順6】
1.まずは、現在表示されている時計画面を長押して、ウォッチフェイスの選択モードにします。
※Sumsung Gear Live(Android Wear)で試しています。


2.左右にスワイプさせると上記で作成・インストールしたウォッチフェイスがあるので、選択。


3.以下の様に表示されれば成功です。


以上です。

2014年8月26日火曜日

Android Wearでウォッチフェイスを作成する方法

【目的】
Android Wearでウォッチフェイスを作成します。
※ウォッチフェイスとは時計デバイスで表示されるメインの時計画面です。


【準備】
1.「Extrasライブラリ(Android Support Library v20等)のアップデート」の手順で、「Android Support Library」をv20に更新しておきます。
2.「wearable 1.0.0のライブラリプロジェクトの作成方法」の手順で、「wearable 1.0.0」のライブラリプロジェクトを作成しておきます。
※ADT23.0.2ではAndroid Wearに対応していない為の、暫定処置です。

※実機でデバッグする場合には以下を実行しておきます。
Sumsung Gear LiveのADBドライバのインストール方法」の手順で、ADBドライバをインストールしておきます。


【手順1】
1.「Androidプロジェクトの作成・実行方法(バージョン別一覧)」のAndroidプロジェクトの作成手順で、「AndroidWearSample16-001-WatchFace」といプロジェクトを作成。
※プロジェクトの設定は以下の通り。
※他の項目は任意。
項目名 項目に設定する値
アプリケーション名(Application Name) com.example.androidwearsample16_001
プロジェクト名(Project Name) AndroidWearSample16-001-WatchFace
パッケージ名(Package Name) com.example.androidwearsample16_001
Build SDK API 20
Minimum Required SDK API 20

2.「wearable 1.0.0プロジェクトをライブラリに指定する方法」の手順で、wearable 1.0.0をライブラリ設定しておきます。
3.「android-support-v13.jarをライブラリに設定する方法」の手順で、android-support-v13.jarをライブラリ設定しておきます。


【手順2】
1.「AndroidManifest.xml」は以下の通り。
<manifest xmlns:android="http://schemas.android.com/apk/res/android"
    package="com.example.androidwearsample16_001"
    android:versionCode="1"
    android:versionName="1.0" >

    <uses-feature android:name="android.hardware.type.watch" />

    <uses-sdk
        android:minSdkVersion="20"
        android:targetSdkVersion="20" />

    <application
        android:allowBackup="true"
        android:icon="@drawable/ic_launcher"
        android:theme="@android:style/Theme.DeviceDefault.Light" >
        <activity
            android:name="com.example.androidwearsample16_001.MainActivity"
            android:allowEmbedded="true"
            android:label="サンプル時計" >
            <meta-data
                android:name="com.google.android.clockwork.home.preview"
                android:resource="@drawable/ic_launcher" />

            <intent-filter>
                <action android:name="android.intent.action.MAIN" />

                <category android:name="com.google.android.clockwork.home.category.HOME_BACKGROUND" />
            </intent-filter>
        </activity>
    </application>

</manifest>
2.「Ctrl+Shift+F」を押し、コードをフォーマッティング。
3.「Ctrl+S」を押し、ファイルを保存。


【手順3】
1.「res/layout/activity_main.xml」は以下の通り。
<LinearLayout xmlns:android="http://schemas.android.com/apk/res/android"
    android:layout_width="match_parent"
    android:layout_height="match_parent"
    android:orientation="vertical" >

    <TextView
        android:id="@+id/time"
        android:layout_width="match_parent"
        android:layout_height="match_parent"
        android:gravity="center_vertical|center_horizontal"
        android:textSize="50sp" />

</LinearLayout>
2.「Ctrl+Shift+F」を押し、コードをフォーマッティング。
3.「Ctrl+S」を押し、ファイルを保存。


【手順4】
1.「src/com/example/androidwearsample16_001/MainActivity.java」は以下の通り。
package com.example.androidwearsample16_001;

import java.text.SimpleDateFormat;
import java.util.Calendar;
import java.util.Locale;

import android.app.Activity;
import android.content.BroadcastReceiver;
import android.content.Context;
import android.content.Intent;
import android.content.IntentFilter;
import android.os.Bundle;
import android.widget.TextView;

public class MainActivity extends Activity {
    private final static IntentFilter INTENT_FILTER;
    private TextView textViewTime;

    static {
        INTENT_FILTER = new IntentFilter();
        INTENT_FILTER.addAction(Intent.ACTION_TIME_TICK);
        INTENT_FILTER.addAction(Intent.ACTION_TIMEZONE_CHANGED);
        INTENT_FILTER.addAction(Intent.ACTION_TIME_CHANGED);
    }

    @Override
    protected void onCreate(Bundle savedInstanceState) {
        super.onCreate(savedInstanceState);
        setContentView(R.layout.activity_main);
        textViewTime = (TextView) findViewById(R.id.time);
        setTextView();
        registerReceiver(timeReceiver, INTENT_FILTER);
    }

    @Override
    protected void onDestroy() {
        super.onDestroy();
        unregisterReceiver(timeReceiver);
    }

    private void setTextView() {
        this.textViewTime.setText(new SimpleDateFormat("HH:mm", Locale.JAPANESE).format(Calendar.getInstance().getTime()));
    }

    private BroadcastReceiver timeReceiver = new BroadcastReceiver() {
        @Override
        public void onReceive(Context context, Intent intent) {
            setTextView();
        }
    };
}
2.「Ctrl+Shift+F」を押し、コードをフォーマッティング。
3.「Ctrl+S」を押し、ファイルを保存。


【手順5】
1.「Androidプロジェクトの作成・実行方法(バージョン別一覧)」のAndroidプロジェクトの実行手順で、実行。
※Android Wearの実機で動かす場合は、実機とPCをUSBで接続する。
※以下の様にインストールのみ実施されます。


【手順6】
1.まずは、現在表示されている時計画面を長押して、ウォッチフェイスの選択モードにします。
※Sumsung Gear Live(Android Wear)で試しています。


2.左右にスワイプさせると上記で作成・インストールしたウォッチフェイスがあるので、選択。


3.以下の様に表示されれば成功です。


以上です。

2014年7月31日木曜日

Android WearのViewPagerで個別レイアウトのページ表示する方法

【目的】
Android WearのViewPagerで個別レイアウトのページ表示させます。


【準備】
1.「Extrasライブラリ(Android Support Library v20等)のアップデート」の手順で、「Android Support Library」をv20に更新しておきます。
2.「wearable 1.0.0のライブラリプロジェクトの作成方法」の手順で、「wearable 1.0.0」のライブラリプロジェクトを作成しておきます。
※ADT23.0.2ではAndroid Wearに対応していない為の、暫定処置です。

※実機でデバッグする場合には以下を実行しておきます。
Sumsung Gear LiveのADBドライバのインストール方法」の手順で、ADBドライバをインストールしておきます。


【手順1】
1.「Androidプロジェクトの作成・実行方法(バージョン別一覧)」のAndroidプロジェクトの作成手順で、「AndroidWearSample15-002-ViewPagerFragment」といプロジェクトを作成。
※プロジェクトの設定は以下の通り。
※他の項目は任意。
項目名 項目に設定する値
アプリケーション名(Application Name) com.example.androidwearsample15_002
プロジェクト名(Project Name) AndroidWearSample15-002-ViewPagerFragment
パッケージ名(Package Name) com.example.androidwearsample15_002
Build SDK API 20
Minimum Required SDK API 20

2.「wearable 1.0.0プロジェクトをライブラリに指定する方法」の手順で、wearable 1.0.0をライブラリ設定しておきます。
3.「android-support-v13.jarをライブラリに設定する方法」の手順で、android-support-v13.jarをライブラリ設定しておきます。


【手順2】
1.「AndroidManifest.xml」は以下の通り。
<manifest xmlns:android="http://schemas.android.com/apk/res/android"
    package="com.example.androidwearsample15_002"
    android:versionCode="1"
    android:versionName="1.0" >

    <uses-sdk
        android:minSdkVersion="20"
        android:targetSdkVersion="20" />

    <application
        android:allowBackup="true"
        android:icon="@drawable/ic_launcher"
        android:theme="@android:style/Theme.DeviceDefault.Light" >
        <activity android:name="com.example.androidwearsample15_002.MainActivity" >
            <intent-filter>
                <action android:name="android.intent.action.MAIN" />

                <category android:name="android.intent.category.LAUNCHER" />
            </intent-filter>
        </activity>
    </application>

</manifest>
2.「Ctrl+Shift+F」を押し、コードをフォーマッティング。
3.「Ctrl+S」を押し、ファイルを保存。


【手順3】
1.「res/layout/activity_main.xml」は以下の通り。
<android.support.v4.view.ViewPager xmlns:android="http://schemas.android.com/apk/res/android"
    android:id="@+id/pager"
    android:layout_width="match_parent"
    android:layout_height="match_parent" />
2.「Ctrl+Shift+F」を押し、コードをフォーマッティング。
3.「Ctrl+S」を押し、ファイルを保存。


【手順4】
1.「任意のファイルの作成方法」の手順で「res/layout/fragment_sample.xml」を作成。
2.「res/layout/fragment_sample.xml」は以下の通り。
<LinearLayout xmlns:android="http://schemas.android.com/apk/res/android"
    android:layout_width="match_parent"
    android:layout_height="match_parent"
    android:background="@color/white"
    android:orientation="vertical" >

    <TextView
        android:id="@+id/text"
        android:layout_width="fill_parent"
        android:layout_height="wrap_content" />

    <Button
        android:layout_width="wrap_content"
        android:layout_height="wrap_content"
        android:text="ボタン" />

</LinearLayout>
3.「Ctrl+Shift+F」を押し、コードをフォーマッティング。
4.「Ctrl+S」を押し、ファイルを保存。


【手順5】
1.「src/com/example/androidwearsample15_002/MainActivity.java」は以下の通り。
package com.example.androidwearsample15_002;

import java.util.ArrayList;
import java.util.List;

import android.app.Activity;
import android.app.Fragment;
import android.app.FragmentManager;
import android.os.Bundle;
import android.support.v13.app.FragmentPagerAdapter;
import android.support.v4.view.ViewPager;

public class MainActivity extends Activity {
    private ViewPager viewPager;

    @Override
    protected void onCreate(Bundle savedInstanceState) {
        super.onCreate(savedInstanceState);
        setContentView(R.layout.activity_main);
        viewPager = (ViewPager) findViewById(R.id.pager);
        PagerAdapter adapter = new PagerAdapter(getFragmentManager());
        adapter.addFragment(new SampleFragment(1));
        adapter.addFragment(new SampleFragment(2));
        viewPager.setAdapter(adapter);
    }

    private class PagerAdapter extends FragmentPagerAdapter {
        List<Fragment> fragmentList = null;

        public PagerAdapter(FragmentManager fragmentManager) {
            super(fragmentManager);
            fragmentList = new ArrayList<Fragment>();
        }

        @Override
        public Fragment getItem(int position) {
            return fragmentList.get(position);
        }

        @Override
        public int getCount() {
            return fragmentList.size();
        }

        public void addFragment(Fragment fragment) {
            fragmentList.add(fragment);
            notifyDataSetChanged();
        }
    }
}
2.「Ctrl+Shift+F」を押し、コードをフォーマッティング。
3.「Ctrl+S」を押し、ファイルを保存。


【手順6】
1.「任意のファイルの作成方法」の手順で「src/com/example/androidwearsample15_002/SampleFragment.java」を作成。
2.「src/com/example/androidwearsample15_002/SampleFragment.java」は以下の通り。
package com.example.androidwearsample15_002;

import android.app.Fragment;
import android.os.Bundle;
import android.view.LayoutInflater;
import android.view.View;
import android.view.ViewGroup;
import android.widget.TextView;

public class SampleFragment extends Fragment {
    private int pageNo;

    public SampleFragment(int pageNo) {
        this.pageNo = pageNo;
    }

    @Override
    public View onCreateView(LayoutInflater inflater, ViewGroup container, Bundle savedInstanceState) {
        View view = inflater.inflate(R.layout.fragment_sample, container, false);
        ((TextView) view.findViewById(R.id.text)).setText(pageNo + "ページ目");
        return view;
    }
}
3.「Ctrl+Shift+F」を押し、コードをフォーマッティング。
4.「Ctrl+S」を押し、ファイルを保存。


【手順5】
1.「Androidプロジェクトの作成・実行方法(バージョン別一覧)」のAndroidプロジェクトの実行手順で、実行。
※Android Wearの実機で動かす場合は、実機とPCをUSBで接続する。


【手順6】
1.Sumsung Gear Live(Android Wear)の場合、以下の様に表示されます。


2.スワイプでページを移動できます。


以上です。

関連記事