iText2.1.7のライブラリを使用し、PDFでレイヤを使用し印刷しないレイヤを持つPDFを作成する。
【手順】
1.「Javaプロジェクトの作成方法」の手順で、「iTextSample009-LayerNoPrint」といプロジェクトを作成。
2.「itext-2.1.7.jarをライブラリに設定する方法」の手順で、プロジェクトに「itext-2.1.7.jar」のライブラリを追加。
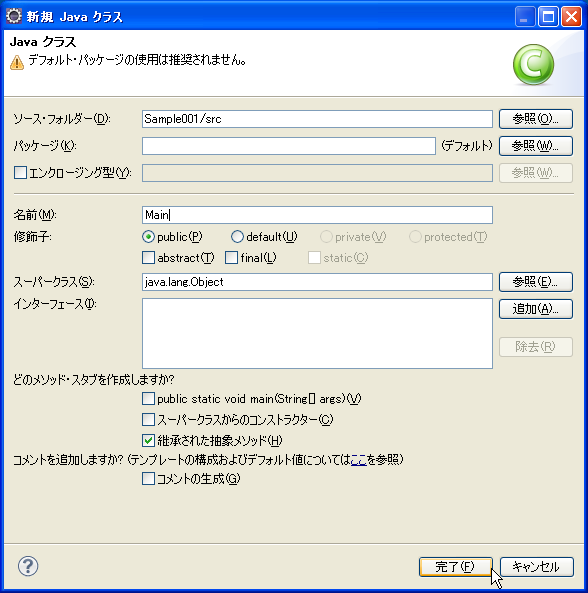
3.「Javaクラスファイルの作成方法」の手順で、「Main」というクラスを作成。
4.「Main.java」を以下の様に入力。
import java.io.FileOutputStream;
import java.io.IOException;

import com.lowagie.text.Document;
import com.lowagie.text.DocumentException;
import com.lowagie.text.Element;
import com.lowagie.text.Image;
import com.lowagie.text.PageSize;
import com.lowagie.text.Phrase;
import com.lowagie.text.pdf.ColumnText;
import com.lowagie.text.pdf.PdfContentByte;
import com.lowagie.text.pdf.PdfLayer;
import com.lowagie.text.pdf.PdfWriter;

public class Main {
    public static final String OUTPUT_FILE_NAME = "LayerNoPrint.pdf";
    public static final String IMAGE = "HelloImage.jpg";

    public static void main(String[] args) throws DocumentException,
            IOException {
        Document document = new Document(PageSize.A3.rotate());
        PdfWriter writer = PdfWriter.getInstance(document,
                new FileOutputStream(OUTPUT_FILE_NAME));
        writer.setViewerPreferences(PdfWriter.PageModeUseOC);

        document.open();
        PdfContentByte cb = writer.getDirectContent();
        PdfLayer layer1 = new PdfLayer("Layer1 Sample", writer);
        layer1.setPrint("", false);

        Image img = Image.getInstance(IMAGE);
        img.setLayer(layer1);
        img.setAbsolutePosition(50, 50);
        cb.addImage(img);


        PdfLayer layer2 = new PdfLayer("Layer2 Sample", writer);
        Phrase phrase = new Phrase("Layer 2");

        cb.beginLayer(layer2);
        ColumnText.showTextAligned(cb, Element.ALIGN_LEFT, phrase, 100, 100, 0f);
        cb.endLayer();

        document.close();
    }
}
5.「Ctrl+Shift+O」を押し、パッケージのインポート文を補完。6.「Ctrl+Shift+F」を押し、ソースコードをフォーマッティング。
7.「HelloImage.jpg」をコピーし、「iTextSample009-LayerNoPrint」上で「Ctrl+V」で貼り付け。
8.「Javaプロジェクトの実行方法」の手順で、「Main.java」を実行。
9.コンソールにエラーが出力されていないか確認。
(※コンソールが表示されていない場合は、「コンソール・ビューの表示方法」を確認)
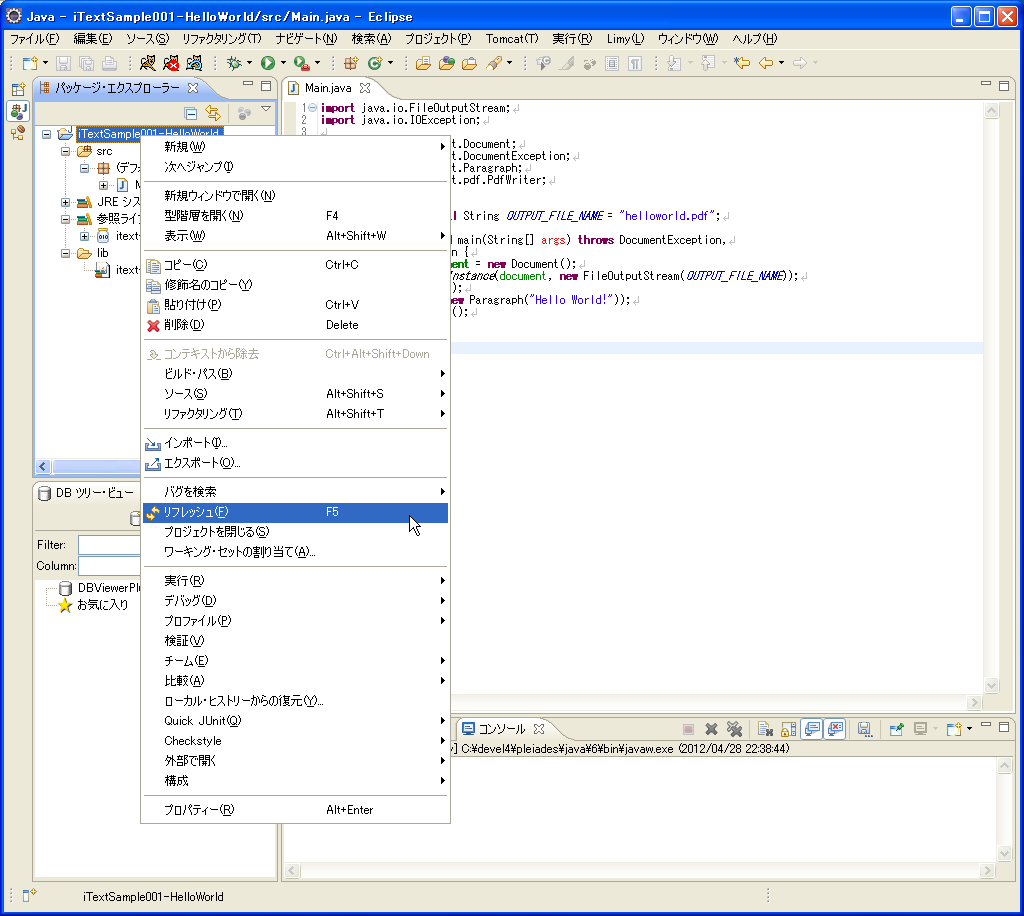
10.「リフレッシュ(ローカルファイルとの同期)の方法」の手順で、プロジェクトをリフレッシュ。
11.「iTextSample009-LayerNoPrint/LayerNoPrint.pdf」が作成されています。
12.「iTextSample009-LayerNoPrint/LayerNoPrint.pdf」をダブルクリック。
13.「LayerNoPrint.pdf」が以下の様に開けます。
14.「印刷」ボタンをクリック。

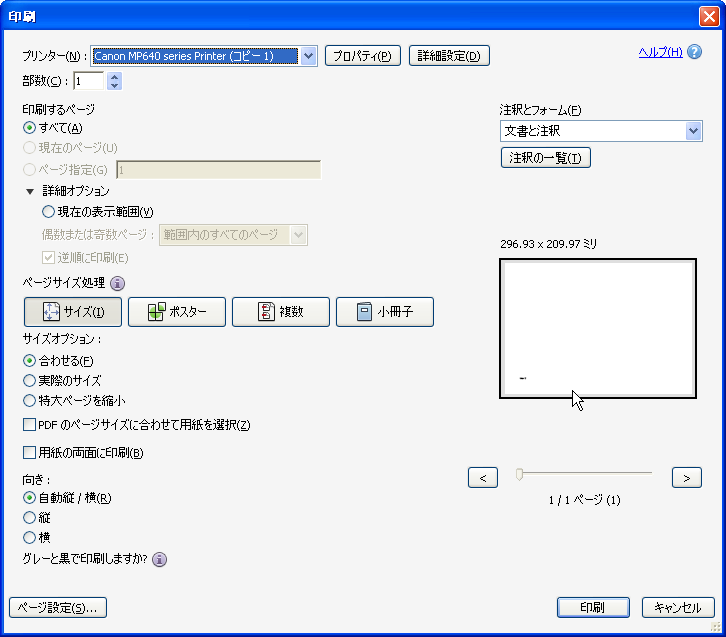


Java%E3%83%97%E3%83%AD%E3%82%B0%E3%83%A9%E3%83%A0%E3%81%AE%E4%BD%9C%E6%88%90%E6%96%B9%E6%B3%95-3.png)
Java%E3%83%97%E3%83%AD%E3%82%B0%E3%83%A9%E3%83%A0%E3%81%AE%E4%BD%9C%E6%88%90%E6%96%B9%E6%B3%95-4.png)
Java%E3%83%97%E3%83%AD%E3%82%B0%E3%83%A9%E3%83%A0%E3%81%AE%E4%BD%9C%E6%88%90%E6%96%B9%E6%B3%95-5.png)


-01.png)
-02.png)
-03.png)
-04.png)
-05.png)
-06.png)
-07.png)