VMware Player5.0.2 for Windowsを起動します。
【手順1】
1.デスクトップに作成された「VMware Player」のショートカットを実行。

1.以下の様に「VMware Player」が起動すれば成功です。

以上です。


| ウィザード名 | 項目名 | 項目に設定する値 |
| 動的 Web プロジェクト | プロジェクト名 | JSF22Sample202-h-commandButtonActionBeanValue |
| ターゲット・ランタイム | GlassFish 4.0 | |
| 動的 web モジュールバージョン | 3.1 | |
| プロジェクト・ファセット | JavaServer Faces | チェック有り バージョン(2.2) |
| Java | ビルド・パス上のソース・フォルダー | src |
| デフォルト出力フォルダー | build\classes | |
| Web モジュール | コンテキスト・ルート | JSF22Sample202-h-commandButtonActionBeanValue |
| コンテンツ・ディレクトリー | WebContent | |
| web.xml デプロイメント記述子の作成 | チェックあり | |
| JSF 機能 | JSF 実装ライブラリー | GlassFish System Library |
| Configure JSF servlet in deployment descriptor | チェック有り | |
| JSF 構成ファイル | /WEB-INF/faces-config.xml | |
| JSF サーブレット名 | Faces Servlet | |
| JSF Servlet Class Name | javax.faces.webapp.FacesServlet | |
| URL マッピング・パターン | /faces/* |
<?xml version="1.0" encoding="UTF-8"?>
<web-app xmlns:xsi="http://www.w3.org/2001/XMLSchema-instance"
    xmlns="http://xmlns.jcp.org/xml/ns/javaee"
    xsi:schemaLocation="http://xmlns.jcp.org/xml/ns/javaee http://xmlns.jcp.org/xml/ns/javaee/web-app_3_1.xsd"
    id="WebApp_ID" version="3.1">

    <display-name>JSF22Sample202-h-commandButtonActionBeanValue</display-name>

    <welcome-file-list>
        <welcome-file>faces/index.xhtml</welcome-file>
    </welcome-file-list>

    <servlet>
        <servlet-name>Faces Servlet</servlet-name>
        <servlet-class>javax.faces.webapp.FacesServlet</servlet-class>
        <load-on-startup>1</load-on-startup>
    </servlet>

    <servlet-mapping>
        <servlet-name>Faces Servlet</servlet-name>
        <url-pattern>/faces/*</url-pattern>
    </servlet-mapping>
</web-app>
package sample;

import javax.enterprise.context.RequestScoped;
import javax.inject.Named;

@Named
@RequestScoped
public class SampleBean {
    public String action() {
        System.out.println("actionが呼び出されました。");
        return "page2";
    }
}
<html xmlns="http://www.w3.org/1999/xhtml"
      xmlns:h="http://xmlns.jcp.org/jsf/html">
<h:head>
</h:head>
<h:body>
    <h:outputText value="#{sampleBean.text}" escape="false" />
</h:body>
</html>
<html xmlns="http://www.w3.org/1999/xhtml"
    xmlns:h="http://xmlns.jcp.org/jsf/html">
<h:head>
</h:head>
<h:body>
    ページ2です。
</h:body>
</html>
http://localhost:8080/JSF22Sample202-h-commandButtonActionBeanValue/faces/index.xhtml


<html xmlns="http://www.w3.org/1999/xhtml">
    <head id="j_idt2"></head>
    <body>
        <form id="j_idt4" name="j_idt4" method="post" action="/JSF22Sample202-h-commandButtonActionBeanValue/faces/index.xhtml;jsessionid=99e90060394f2f796831df399a3a" enctype="application/x-www-form-urlencoded">
            <input type="hidden" name="j_idt4" value="j_idt4" />
            <input type="submit" name="j_idt4:j_idt5" value="移動" />
            <input type="hidden" name="javax.faces.ViewState" id="j_id1:javax.faces.ViewState:0" value="2120590524293682529:-6012974635607438027" autocomplete="off" />
        </form>
    </body>
</html>
| ウィザード名 | 項目名 | 項目に設定する値 |
| 動的 Web プロジェクト | プロジェクト名 | JSF22Sample101-h-commandButtonAction |
| ターゲット・ランタイム | GlassFish 4.0 | |
| 動的 web モジュールバージョン | 3.1 | |
| プロジェクト・ファセット | JavaServer Faces | チェック有り バージョン(2.2) |
| Java | ビルド・パス上のソース・フォルダー | src |
| デフォルト出力フォルダー | build\classes | |
| Web モジュール | コンテキスト・ルート | JSF22Sample101-h-commandButtonAction |
| コンテンツ・ディレクトリー | WebContent | |
| web.xml デプロイメント記述子の作成 | チェックあり | |
| JSF 機能 | JSF 実装ライブラリー | GlassFish System Library |
| Configure JSF servlet in deployment descriptor | チェック有り | |
| JSF 構成ファイル | /WEB-INF/faces-config.xml | |
| JSF サーブレット名 | Faces Servlet | |
| JSF Servlet Class Name | javax.faces.webapp.FacesServlet | |
| URL マッピング・パターン | /faces/* |
<?xml version="1.0" encoding="UTF-8"?>
<web-app xmlns:xsi="http://www.w3.org/2001/XMLSchema-instance"
    xmlns="http://xmlns.jcp.org/xml/ns/javaee"
    xsi:schemaLocation="http://xmlns.jcp.org/xml/ns/javaee http://xmlns.jcp.org/xml/ns/javaee/web-app_3_1.xsd"
    id="WebApp_ID" version="3.1">

    <display-name>JSF22Sample101-h-commandButtonAction</display-name>

    <welcome-file-list>
        <welcome-file>faces/index.xhtml</welcome-file>
    </welcome-file-list>

    <servlet>
        <servlet-name>Faces Servlet</servlet-name>
        <servlet-class>javax.faces.webapp.FacesServlet</servlet-class>
        <load-on-startup>1</load-on-startup>
    </servlet>

    <servlet-mapping>
        <servlet-name>Faces Servlet</servlet-name>
        <url-pattern>/faces/*</url-pattern>
    </servlet-mapping>
</web-app>
<html xmlns="http://www.w3.org/1999/xhtml"
    xmlns:h="http://xmlns.jcp.org/jsf/html">
<h:head>
</h:head>
<h:body>
    <h:form>
        <h:commandButton value="移動" action="page2" />
    </h:form>
</h:body>
</html>
<html xmlns="http://www.w3.org/1999/xhtml"
    xmlns:h="http://xmlns.jcp.org/jsf/html">
<h:head>
</h:head>
<h:body>
    ページ2です。
</h:body>
</html>
http://localhost:8080/JSF22Sample101-h-commandButtonAction/faces/index.xhtml


<html xmlns="http://www.w3.org/1999/xhtml">
    <head id="j_idt2">
    </head>
    <body>
        <form id="j_idt4" name="j_idt4" method="post" action="/JSF22Sample101-h-commandButtonAction/faces/index.xhtml" enctype="application/x-www-form-urlencoded">
            <input type="hidden" name="j_idt4" value="j_idt4" />
            <input type="submit" name="j_idt4:j_idt5" value="移動" />
            <input type="hidden" name="javax.faces.ViewState" id="j_id1:javax.faces.ViewState:0" value="5062835420762175325:7914364872365477917" autocomplete="off" />
        </form>
    </body>
</html>
| ウィザード名 | 項目名 | 項目に設定する値 |
| 動的 Web プロジェクト | プロジェクト名 | JSF22Sample101-h-form |
| ターゲット・ランタイム | GlassFish 4.0 | |
| 動的 web モジュールバージョン | 3.1 | |
| プロジェクト・ファセット | JavaServer Faces | チェック有り バージョン(2.2) |
| Java | ビルド・パス上のソース・フォルダー | src |
| デフォルト出力フォルダー | build\classes | |
| Web モジュール | コンテキスト・ルート | JSF22Sample101-h-form |
| コンテンツ・ディレクトリー | WebContent | |
| web.xml デプロイメント記述子の作成 | チェックあり | |
| JSF 機能 | JSF 実装ライブラリー | GlassFish System Library |
| Configure JSF servlet in deployment descriptor | チェック有り | |
| JSF 構成ファイル | /WEB-INF/faces-config.xml | |
| JSF サーブレット名 | Faces Servlet | |
| JSF Servlet Class Name | javax.faces.webapp.FacesServlet | |
| URL マッピング・パターン | /faces/* |
<?xml version="1.0" encoding="UTF-8"?>
<web-app xmlns:xsi="http://www.w3.org/2001/XMLSchema-instance"
    xmlns="http://xmlns.jcp.org/xml/ns/javaee"
    xsi:schemaLocation="http://xmlns.jcp.org/xml/ns/javaee http://xmlns.jcp.org/xml/ns/javaee/web-app_3_1.xsd"
    id="WebApp_ID" version="3.1">

    <display-name>JSF22Sample101-h-form</display-name>

    <welcome-file-list>
        <welcome-file>faces/index.xhtml</welcome-file>
    </welcome-file-list>

    <servlet>
        <servlet-name>Faces Servlet</servlet-name>
        <servlet-class>javax.faces.webapp.FacesServlet</servlet-class>
        <load-on-startup>1</load-on-startup>
    </servlet>

    <servlet-mapping>
        <servlet-name>Faces Servlet</servlet-name>
        <url-pattern>/faces/*</url-pattern>
    </servlet-mapping>
</web-app>
<html xmlns="http://www.w3.org/1999/xhtml"
    xmlns:h="http://xmlns.jcp.org/jsf/html">
<h:head>
</h:head>
<h:body>
    <h:form>
        formのみ。
    </h:form>
</h:body>
</html>
http://localhost:8080/JSF22Sample101-h-form/faces/index.xhtml

<html xmlns="http://www.w3.org/1999/xhtml">
    <head id="j_idt2">
    </head>
    <body>
        <form id="j_idt4" name="j_idt4" method="post" action="/JSF22Sample101-h-form/faces/index.xhtml;jsessionid=4d320b02deee3bea332ab37d7c78" enctype="application/x-www-form-urlencoded">
            <input type="hidden" name="j_idt4" value="j_idt4" />
            formのみ。
            <input type="hidden" name="javax.faces.ViewState" id="j_id1:javax.faces.ViewState:0" value="-6567124597442535192:1682591068202106085" autocomplete="off" />
        </form>
    </body>
</html>
| ウィザード名 | 項目名 | 項目に設定する値 |
| 動的 Web プロジェクト | プロジェクト名 | JSF22Sample007-h-outputTextBeanValueNoEscape |
| ターゲット・ランタイム | GlassFish 4.0 | |
| 動的 web モジュールバージョン | 3.1 | |
| プロジェクト・ファセット | JavaServer Faces | チェック有り バージョン(2.2) |
| Java | ビルド・パス上のソース・フォルダー | src |
| デフォルト出力フォルダー | build\classes | |
| Web モジュール | コンテキスト・ルート | JSF22Sample007-h-outputTextBeanValueNoEscape |
| コンテンツ・ディレクトリー | WebContent | |
| web.xml デプロイメント記述子の作成 | チェックあり | |
| JSF 機能 | JSF 実装ライブラリー | GlassFish System Library |
| Configure JSF servlet in deployment descriptor | チェック有り | |
| JSF 構成ファイル | /WEB-INF/faces-config.xml | |
| JSF サーブレット名 | Faces Servlet | |
| JSF Servlet Class Name | javax.faces.webapp.FacesServlet | |
| URL マッピング・パターン | /faces/* |
<?xml version="1.0" encoding="UTF-8"?>
<web-app xmlns:xsi="http://www.w3.org/2001/XMLSchema-instance"
    xmlns="http://xmlns.jcp.org/xml/ns/javaee"
    xsi:schemaLocation="http://xmlns.jcp.org/xml/ns/javaee http://xmlns.jcp.org/xml/ns/javaee/web-app_3_1.xsd"
    id="WebApp_ID" version="3.1">

    <display-name>JSF22Sample007-h-outputTextBeanValueNoEscape</display-name>

    <welcome-file-list>
        <welcome-file>faces/index.xhtml</welcome-file>
    </welcome-file-list>

    <servlet>
        <servlet-name>Faces Servlet</servlet-name>
        <servlet-class>javax.faces.webapp.FacesServlet</servlet-class>
        <load-on-startup>1</load-on-startup>
    </servlet>

    <servlet-mapping>
        <servlet-name>Faces Servlet</servlet-name>
        <url-pattern>/faces/*</url-pattern>
    </servlet-mapping>
</web-app>
package sample;

import javax.annotation.PostConstruct;
import javax.enterprise.context.RequestScoped;
import javax.inject.Named;

@Named
@RequestScoped
public class SampleBean {
    private String text;

    @PostConstruct
    public void init() {
        this.text = "あいうえお<br />かきくけこ";
    }

    public String getText() {
        return text;
    }

    public void setText(String text) {
        this.text = text;
    }
}
<html xmlns="http://www.w3.org/1999/xhtml"
      xmlns:h="http://xmlns.jcp.org/jsf/html">
<h:head>
</h:head>
<h:body>
    <h:outputText value="#{sampleBean.text}" escape="false" />
</h:body>
</html>
http://localhost:8080/JSF22Sample007-h-outputTextBeanValueNoEscape/faces/index.xhtml

<html xmlns="http://www.w3.org/1999/xhtml">
    <head id="j_idt2">
    </head>
    <body>
        あいうえお<br />かきくけこ
    </body>
</html>
| ウィザード名 | 項目名 | 項目に設定する値 |
| 動的 Web プロジェクト | プロジェクト名 | JSF22Sample006-h-outputTextBeanValue |
| ターゲット・ランタイム | GlassFish 4.0 | |
| 動的 web モジュールバージョン | 3.1 | |
| プロジェクト・ファセット | JavaServer Faces | チェック有り バージョン(2.2) |
| Java | ビルド・パス上のソース・フォルダー | src |
| デフォルト出力フォルダー | build\classes | |
| Web モジュール | コンテキスト・ルート | JSF22Sample006-h-outputTextBeanValue |
| コンテンツ・ディレクトリー | WebContent | |
| web.xml デプロイメント記述子の作成 | チェックあり | |
| JSF 機能 | JSF 実装ライブラリー | GlassFish System Library |
| Configure JSF servlet in deployment descriptor | チェック有り | |
| JSF 構成ファイル | /WEB-INF/faces-config.xml | |
| JSF サーブレット名 | Faces Servlet | |
| JSF Servlet Class Name | javax.faces.webapp.FacesServlet | |
| URL マッピング・パターン | /faces/* |
<?xml version="1.0" encoding="UTF-8"?>
<web-app xmlns:xsi="http://www.w3.org/2001/XMLSchema-instance"
    xmlns="http://xmlns.jcp.org/xml/ns/javaee"
    xsi:schemaLocation="http://xmlns.jcp.org/xml/ns/javaee http://xmlns.jcp.org/xml/ns/javaee/web-app_3_1.xsd"
    id="WebApp_ID" version="3.1">

    <display-name>JSF22Sample006-h-outputTextBeanValue</display-name>

    <welcome-file-list>
        <welcome-file>faces/index.xhtml</welcome-file>
    </welcome-file-list>

    <servlet>
        <servlet-name>Faces Servlet</servlet-name>
        <servlet-class>javax.faces.webapp.FacesServlet</servlet-class>
        <load-on-startup>1</load-on-startup>
    </servlet>

    <servlet-mapping>
        <servlet-name>Faces Servlet</servlet-name>
        <url-pattern>/faces/*</url-pattern>
    </servlet-mapping>
</web-app>
package sample;

import javax.annotation.PostConstruct;
import javax.enterprise.context.RequestScoped;
import javax.inject.Named;

@Named
@RequestScoped
public class SampleBean {
    private String text;

    @PostConstruct
    public void init() {
        this.text = "あいうえお<br />かきくけこ";
    }

    public String getText() {
        return text;
    }

    public void setText(String text) {
        this.text = text;
    }
}
<html xmlns="http://www.w3.org/1999/xhtml"
      xmlns:h="http://xmlns.jcp.org/jsf/html">
<h:head>
</h:head>
<h:body>
    <h:outputText value="#{sampleBean.text}" />
</h:body>
</html>
http://localhost:8080/JSF22Sample006-h-outputTextBeanValue/faces/index.xhtml

<html xmlns="http://www.w3.org/1999/xhtml">
<head id="j_idt2">
</head>
<body>
あいうえお<br />かきくけこ
</body>
</html>
| ウィザード名 | 項目名 | 項目に設定する値 |
| 動的 Web プロジェクト | プロジェクト名 | JSF22Sample005-h-outputTextStyleClass |
| ターゲット・ランタイム | GlassFish 4.0 | |
| 動的 web モジュールバージョン | 3.1 | |
| プロジェクト・ファセット | JavaServer Faces | チェック有り バージョン(2.2) |
| Java | ビルド・パス上のソース・フォルダー | src |
| デフォルト出力フォルダー | build\classes | |
| Web モジュール | コンテキスト・ルート | JSF22Sample005-h-outputTextStyleClass |
| コンテンツ・ディレクトリー | WebContent | |
| web.xml デプロイメント記述子の作成 | チェックあり | |
| JSF 機能 | JSF 実装ライブラリー | GlassFish System Library |
| Configure JSF servlet in deployment descriptor | チェック有り | |
| JSF 構成ファイル | /WEB-INF/faces-config.xml | |
| JSF サーブレット名 | Faces Servlet | |
| JSF Servlet Class Name | javax.faces.webapp.FacesServlet | |
| URL マッピング・パターン | /faces/* |
<?xml version="1.0" encoding="UTF-8"?>
<web-app xmlns:xsi="http://www.w3.org/2001/XMLSchema-instance"
    xmlns="http://xmlns.jcp.org/xml/ns/javaee"
    xsi:schemaLocation="http://xmlns.jcp.org/xml/ns/javaee http://xmlns.jcp.org/xml/ns/javaee/web-app_3_1.xsd"
    id="WebApp_ID" version="3.1">

    <display-name>JSF22Sample005-h-outputTextStyleClass</display-name>

    <welcome-file-list>
        <welcome-file>faces/index.xhtml</welcome-file>
    </welcome-file-list>

    <servlet>
        <servlet-name>Faces Servlet</servlet-name>
        <servlet-class>javax.faces.webapp.FacesServlet</servlet-class>
        <load-on-startup>1</load-on-startup>
    </servlet>

    <servlet-mapping>
        <servlet-name>Faces Servlet</servlet-name>
        <url-pattern>/faces/*</url-pattern>
    </servlet-mapping>
</web-app>
<html xmlns="http://www.w3.org/1999/xhtml"
    xmlns:h="http://xmlns.jcp.org/jsf/html">
<h:head>
    <style>
        .mainColor {
            color: blue;
        }
    </style>
</h:head>
<h:body>
    <h:outputText value="styleのclassを適応" styleClass="mainColor" />
</h:body>
</html>
http://localhost:8080/JSF22Sample005-h-outputTextStyleClass/faces/index.xhtml

<html xmlns="http://www.w3.org/1999/xhtml">
    <head id="j_idt2">
        <style>
            .mainColor {
                color: blue;
            }
        </style>
    </head>
    <body>
        <span class="mainColor">styleのclassを適応</span>
    </body>
</html>
| ウィザード名 | 項目名 | 項目に設定する値 |
| 動的 Web プロジェクト | プロジェクト名 | JSF22Sample004-h-outputTextStyle |
| ターゲット・ランタイム | GlassFish 4.0 | |
| 動的 web モジュールバージョン | 3.1 | |
| プロジェクト・ファセット | JavaServer Faces | チェック有り バージョン(2.2) |
| Java | ビルド・パス上のソース・フォルダー | src |
| デフォルト出力フォルダー | build\classes | |
| Web モジュール | コンテキスト・ルート | JSF22Sample004-h-outputTextStyle |
| コンテンツ・ディレクトリー | WebContent | |
| web.xml デプロイメント記述子の作成 | チェックあり | |
| JSF 機能 | JSF 実装ライブラリー | GlassFish System Library |
| Configure JSF servlet in deployment descriptor | チェック有り | |
| JSF 構成ファイル | /WEB-INF/faces-config.xml | |
| JSF サーブレット名 | Faces Servlet | |
| JSF Servlet Class Name | javax.faces.webapp.FacesServlet | |
| URL マッピング・パターン | /faces/* |
<?xml version="1.0" encoding="UTF-8"?>
<web-app xmlns:xsi="http://www.w3.org/2001/XMLSchema-instance"
    xmlns="http://xmlns.jcp.org/xml/ns/javaee"
    xsi:schemaLocation="http://xmlns.jcp.org/xml/ns/javaee http://xmlns.jcp.org/xml/ns/javaee/web-app_3_1.xsd"
    id="WebApp_ID" version="3.1">

    <display-name>JSF22Sample004-h-outputTextStyle</display-name>

    <welcome-file-list>
        <welcome-file>faces/index.xhtml</welcome-file>
    </welcome-file-list>

    <servlet>
        <servlet-name>Faces Servlet</servlet-name>
        <servlet-class>javax.faces.webapp.FacesServlet</servlet-class>
        <load-on-startup>1</load-on-startup>
    </servlet>

    <servlet-mapping>
        <servlet-name>Faces Servlet</servlet-name>
        <url-pattern>/faces/*</url-pattern>
    </servlet-mapping>
</web-app>
<html xmlns="http://www.w3.org/1999/xhtml"
      xmlns:h="http://xmlns.jcp.org/jsf/html">
<h:head>
</h:head>
<h:body>
    <h:outputText value="インラインのstyleを適応" style="color: blue;" />
</h:body>
</html>
http://localhost:8080/JSF22Sample004-h-outputTextStyle/faces/index.xhtml

<html xmlns="http://www.w3.org/1999/xhtml">
    <head id="j_idt2">
    </head>
    <body>
        <span style="color: blue;">インラインのstyleを適応</span>
    </body>
</html>
| ウィザード名 | 項目名 | 項目に設定する値 |
| 動的 Web プロジェクト | プロジェクト名 | JSF22Sample003-h-outputTextRendered |
| ターゲット・ランタイム | GlassFish 4.0 | |
| 動的 web モジュールバージョン | 3.1 | |
| プロジェクト・ファセット | JavaServer Faces | チェック有り バージョン(2.2) |
| Java | ビルド・パス上のソース・フォルダー | src |
| デフォルト出力フォルダー | build\classes | |
| Web モジュール | コンテキスト・ルート | JSF22Sample003-h-outputTextRendered |
| コンテンツ・ディレクトリー | WebContent | |
| web.xml デプロイメント記述子の作成 | チェックあり | |
| JSF 機能 | JSF 実装ライブラリー | GlassFish System Library |
| Configure JSF servlet in deployment descriptor | チェック有り | |
| JSF 構成ファイル | /WEB-INF/faces-config.xml | |
| JSF サーブレット名 | Faces Servlet | |
| JSF Servlet Class Name | javax.faces.webapp.FacesServlet | |
| URL マッピング・パターン | /faces/* |
<?xml version="1.0" encoding="UTF-8"?>
<web-app xmlns:xsi="http://www.w3.org/2001/XMLSchema-instance"
    xmlns="http://xmlns.jcp.org/xml/ns/javaee"
    xsi:schemaLocation="http://xmlns.jcp.org/xml/ns/javaee http://xmlns.jcp.org/xml/ns/javaee/web-app_3_1.xsd"
    id="WebApp_ID" version="3.1">

    <display-name>JSF22Sample003-h-outputTextRendered</display-name>

    <welcome-file-list>
        <welcome-file>faces/index.xhtml</welcome-file>
    </welcome-file-list>

    <servlet>
        <servlet-name>Faces Servlet</servlet-name>
        <servlet-class>javax.faces.webapp.FacesServlet</servlet-class>
        <load-on-startup>1</load-on-startup>
    </servlet>

    <servlet-mapping>
        <servlet-name>Faces Servlet</servlet-name>
        <url-pattern>/faces/*</url-pattern>
    </servlet-mapping>
</web-app>
<html xmlns="http://www.w3.org/1999/xhtml"
xmlns:h="http://xmlns.jcp.org/jsf/html">
<h:head>
</h:head>
<h:body>
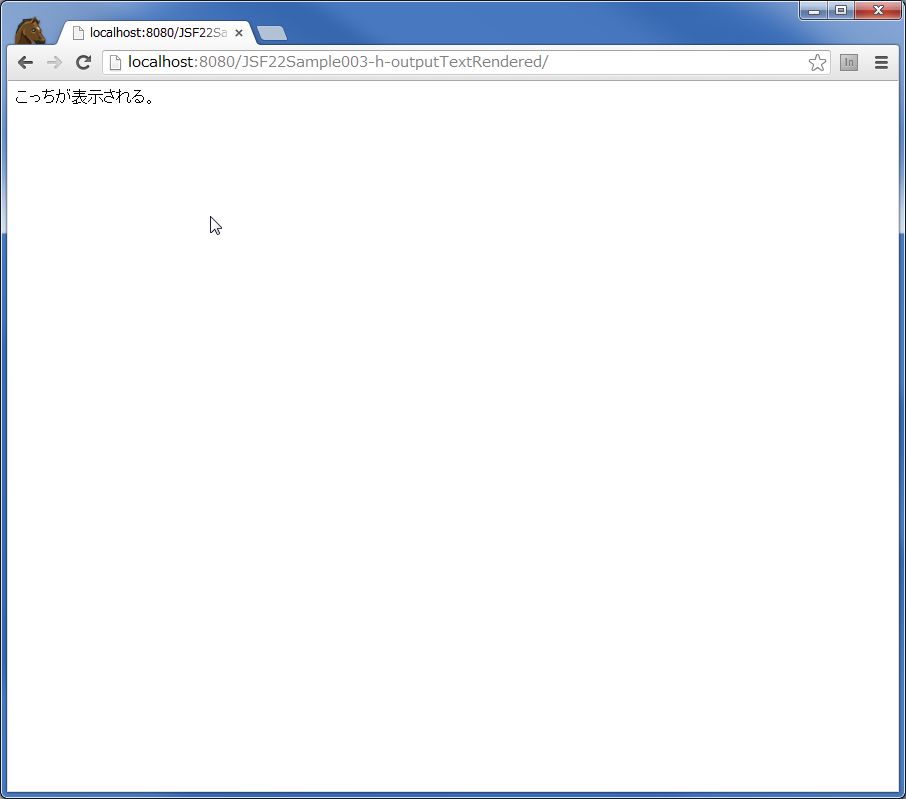
<h:outputText value="こっちは表示されない。" rendered="false" />
<h:outputText value="こっちが表示される。" rendered="true" />
</h:body>
</html>
http://localhost:8080/JSF22Sample003-h-outputTextRendered/faces/index.xhtml
<html xmlns="http://www.w3.org/1999/xhtml">
    <head id="j_idt2">
    </head>
    <body>
        こっちが表示される。
    </body>
</html>
| ウィザード名 | 項目名 | 項目に設定する値 |
| 動的 Web プロジェクト | プロジェクト名 | JSF22Sample002-h-outputText |
| ターゲット・ランタイム | GlassFish 4.0 | |
| 動的 web モジュールバージョン | 3.1 | |
| プロジェクト・ファセット | JavaServer Faces | チェック有り バージョン(2.2) |
| Java | ビルド・パス上のソース・フォルダー | src |
| デフォルト出力フォルダー | build\classes | |
| Web モジュール | コンテキスト・ルート | JSF22Sample002-h-outputText |
| コンテンツ・ディレクトリー | WebContent | |
| web.xml デプロイメント記述子の作成 | チェックあり | |
| JSF 機能 | JSF 実装ライブラリー | GlassFish System Library |
| Configure JSF servlet in deployment descriptor | チェック有り | |
| JSF 構成ファイル | /WEB-INF/faces-config.xml | |
| JSF サーブレット名 | Faces Servlet | |
| JSF Servlet Class Name | javax.faces.webapp.FacesServlet | |
| URL マッピング・パターン | /faces/* |
<?xml version="1.0" encoding="UTF-8"?>
<web-app xmlns:xsi="http://www.w3.org/2001/XMLSchema-instance"
    xmlns="http://xmlns.jcp.org/xml/ns/javaee"
    xsi:schemaLocation="http://xmlns.jcp.org/xml/ns/javaee http://xmlns.jcp.org/xml/ns/javaee/web-app_3_1.xsd"
    id="WebApp_ID" version="3.1">

    <display-name>JSF22Sample002-h-outputText</display-name>

    <welcome-file-list>
        <welcome-file>faces/index.xhtml</welcome-file>
    </welcome-file-list>

    <servlet>
        <servlet-name>Faces Servlet</servlet-name>
        <servlet-class>javax.faces.webapp.FacesServlet</servlet-class>
        <load-on-startup>1</load-on-startup>
    </servlet>

    <servlet-mapping>
        <servlet-name>Faces Servlet</servlet-name>
        <url-pattern>/faces/*</url-pattern>
    </servlet-mapping>
</web-app>
<html xmlns="http://www.w3.org/1999/xhtml"
xmlns:h="http://xmlns.jcp.org/jsf/html">
<h:head>
</h:head>
<h:body>
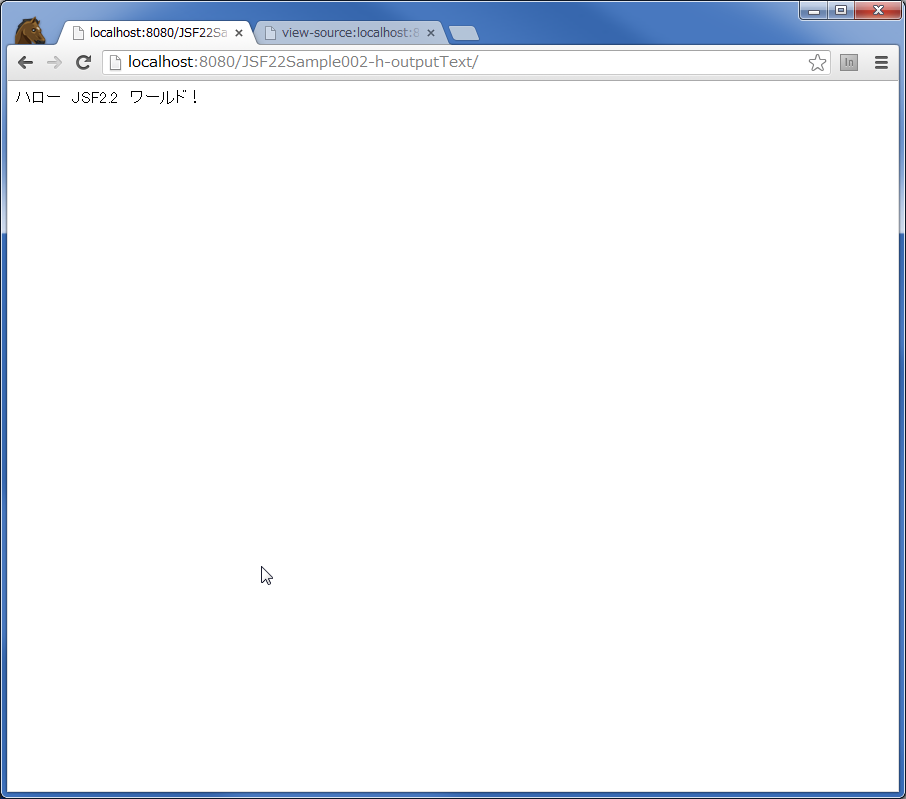
<h:outputText value="ハロー JSF2.2 ワールド!" />
</h:body>
</html>
http://localhost:8080/JSF22Sample002-h-outputText/faces/index.xhtml
<html xmlns="http://www.w3.org/1999/xhtml">
    <head id="j_idt2">
    </head>
    <body>
        ハロー JSF2.2 ワールド!
    </body>
</html>
<!DOCTYPE html>
<html>
    <head>
        <link href="bootstrap/css/bootstrap.min.css" rel="stylesheet" />
    </head>
    <body>
        <div class="navbar">
            <div class="navbar-inner">
                <ul class="nav">
                    <li class="dropdown">
                        <a class="dropdown-toggle" data-toggle="dropdown" href="#">
                            その他
                            <b class="caret"></b>
                        </a>
                        <ul class="dropdown-menu">
                            <li><a href="http://google.com">Google</a></li>
                            <li><a href="http://yahoo.com">Yahoo</a></li>
                            <li class="dropdown-submenu">
                            <a tabindex="-1" href="#">More options</a>
                            <ul class="dropdown-menu">
                                <li><a href="http://google.com">Google</a></li>
                                <li><a href="http://yahoo.com">Yahoo</a></li>
                            </ul>
                        </li>
                        </ul>
                    </li>
                </ul>
            </div>
        </div>

        <script src="http://code.jquery.com/jquery.js"></script>
        <script src="bootstrap/js/bootstrap.min.js"></script>
    </body>
</html>
-01.png)
http://localhost:8080/JSF22Sample001-HelloWorld/faces/index.xhtml


<?xml version="1.0" encoding="UTF-8"?>
<web-app xmlns:xsi="http://www.w3.org/2001/XMLSchema-instance"
    xmlns="http://xmlns.jcp.org/xml/ns/javaee"
    xsi:schemaLocation="http://xmlns.jcp.org/xml/ns/javaee http://xmlns.jcp.org/xml/ns/javaee/web-app_3_1.xsd"
    id="WebApp_ID" version="3.1">

    <display-name>JSF22Sample001-HelloWorld</display-name>

    <welcome-file-list>
        <welcome-file>faces/index.xhtml</welcome-file>
    </welcome-file-list>

    <servlet>
        <servlet-name>Faces Servlet</servlet-name>
        <servlet-class>javax.faces.webapp.FacesServlet</servlet-class>
        <load-on-startup>1</load-on-startup>
    </servlet>

    <servlet-mapping>
        <servlet-name>Faces Servlet</servlet-name>
        <url-pattern>/faces/*</url-pattern>
    </servlet-mapping>
</web-app>
2.「Ctrl+Shift+F」を押し、ソースコードをフォーマッティング、「Ctrl+S」でファイルを保存。<?xml version="1.0" encoding="UTF-8"?>
<faces-config xmlns="http://xmlns.jcp.org/xml/ns/javaee"
xmlns:xsi="http://www.w3.org/2001/XMLSchema-instance"
xsi:schemaLocation="http://xmlns.jcp.org/xml/ns/javaee http://xmlns.jcp.org/xml/ns/javaee/web-facesconfig_2_2.xsd"
version="2.2">
</faces-config>
2.「Ctrl+Shift+F」を押し、ソースコードをフォーマッティング、「Ctrl+S」でファイルを保存。<html xmlns="http://www.w3.org/1999/xhtml"
xmlns:h="http://xmlns.jcp.org/jsf/html">
<h:head>
</h:head>
<h:body>
<h:outputText value="ハローワールド JSF2.2"/>
</h:body>
</html>
3.「Ctrl+Shift+F」を押し、ソースコードをフォーマッティング、「Ctrl+S」でファイルを保存。<input class="countText10" type="text" />
<textarea class="countText200" rows="10"></textarea>
<script src="//ajax.googleapis.com/ajax/libs/jquery/1.10.2/jquery.min.js"></script>
<script src="//sites.google.com/site/foolprogrammer/m5simpleTextCount.js?attredirects=0&d=1"></script>
<script type="text/javascript">
$('.countText10').m5simpleTextCount({
maxLength: 10
});
$('.countText200').m5simpleTextCount({
maxLength: 200
});
</script>
※詳しい使い方は本家を御覧ください。/**
* m5simpleTextCount
*
* @version 1.0
* @author nori (norimania@gmail.com)
* @copyright 5509 (http://5509.me/)
* @license The MIT License
* @link http://5509.me/log/m5simpletextcount
*
* Date: 2010-12-05 21:20
*/
(function($) {
$.fn.m5simpleTextCount = function(options) {
var conf = $.extend({
focusDisplay: true,
padding: '3px',
color: '#3a87ad',
atColor: '#b94a48',
background: '#d9edf7',
atBackground: '#f2dede',
fontWeight: 'bold',
atFontWeight: 'bold',
opacity: .8,
alertLength: -1,
maxLength: 10
}, options);
$(this).each(function() {
var target = $(this),
targetOffset = target.offset(),
border = {
rightWidth: parseInt(target.css('borderRightWidth')),
bottomWidth: parseInt(target.css('borderBottomWidth'))
},
currentCount = getCount(target),
count = $('<span class="simpleTextCount"></span>')
.css({
padding: conf.padding,
display: 'block',
position: 'absolute',
color: conf.color,
background: conf.background,
fontWeight: conf.fontWeight,
opacity: conf.opacity
})
.text(currentCount + '/' + conf.maxLength),
pos = {};
countStyle(currentCount, count);
$(window).resize(function() {
setCountPos(count, getPos(target, count), border)
});
$('body').append(count);
setCountPos(count, getPos(target, count), border);
if ( conf.focusDisplay ) {
count.hide();
target
.focus(function() {
count.stop(true, true).fadeIn(250);
})
.blur(function() {
count.stop(true, true).fadeOut(250);
});
}
target.keyup(function() {
var currentCount = getCount(target);
countStyle(currentCount, count);
count.text(currentCount + '/' + conf.maxLength);
setCountPos(count, getPos(target, count), border);
});
});
function getCount(target) {
return conf.maxLength - target.val().length;
}
function countStyle(currentCount, count) {
if ( currentCount < (conf.alertLength + 1) ) {
count.css({
color: conf.atColor,
background: conf.atBackground,
fontWeight: conf.atFontWeight
});
} else {
count.css({
color: conf.color,
background: conf.background,
fontWeight: conf.fontWeight
});
}
}
function getPos(target, count) {
var targetOffset = target.offset();
return {
x: Math.floor(targetOffset.left),
y: Math.floor(targetOffset.top),
xdash: target.get(0).offsetWidth,
ydash: target.get(0).offsetHeight,
cx: count.get(0).offsetWidth,
cy: count.get(0).offsetHeight
}
}
function setCountPos(count, pos, border) {
return count.css({
left: pos.x + pos.xdash - pos.cx - border.rightWidth,
top: pos.y + pos.ydash - pos.cy - border.bottomWidth
});
}
}
})(jQuery);


