AndroidでGoogle Play Game Servicesで初期非表示の実績を使用します。
【準備】
1.「Google Play services SDKをワークスペースにインポートする方法」で「Google Play services SDK」をワークスペースにインポートしておきます。
2.「Google Play Game ServicesのBaseGameUtilsライブラリをワークスペースにインポートする方法」の手順で、BaseGameUtilsライブラリをワークスペースにインポートしておきます。
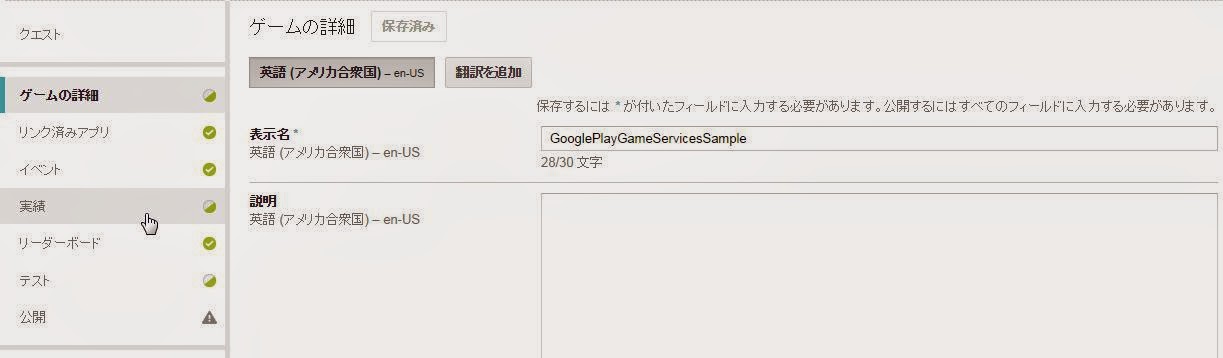
3.「Google Play Developer Consoleでゲームサービスを作成する方法」の手順で、ゲームサービスを作成しておきます。
4.「Google Play Developer Consoleのゲームサービスにテスト用IDを追加する方法」の手順で、テスト用のGoogleIDを追加しておきます。
5.「Google Play Developer Consoleのゲームサービスにアプリをリンクする方法」の手順で、ゲームサービスにアプリをリンクしておきます。
※アプリのパッケージ名は「jp.blogspot.foolprogrammer.googleplaygameservicessample01_006」で行いました。
6.「Google Play Game Servicesのゲームサービスに初期非表示の実績を追加する方法」の手順で、初期非表示の実績を追加しておきます。
【手順1】
1.「Androidプロジェクトの作成・実行方法(バージョン別一覧)」のAndroidプロジェクトの作成手順で、「GooglePlayGameServicesSample01-006-AchievementClosed」といプロジェクトを作成。
※プロジェクトの設定は以下の通り。
※他の項目は任意。
| 項目名 | 項目に設定する値 |
| アプリケーション名(Application Name) | jp.blogspot.foolprogrammer.googleplaygameservicessample01_006 |
| プロジェクト名(Project Name) | GooglePlayGameServicesSample01-006-AchievementClosed |
| パッケージ名(Package Name) | jp.blogspot.foolprogrammer.googleplaygameservicessample01_006 |
| Build SDK | API 10 |
| Minimum Required SDK | API 10 |
2.「Google Play services SDKをライブラリ参照する方法」の手順で、Google Play services SDKをライブラリ設定する。
3.「Google Play Game ServicesのBaseGameUtilsをライブラリ参照する方法」の手順で、BaseGameUtilsをライブラリ設定する。
【手順2】
1.「AndroidManifest.xml」は以下の通り。
<?xml version="1.0" encoding="utf-8"?>
<manifest xmlns:android="http://schemas.android.com/apk/res/android"
    package="jp.blogspot.foolprogrammer.googleplaygameservicessample01_006"
    android:versionCode="1"
    android:versionName="1.0" >

    <uses-sdk
        android:minSdkVersion="10"
        android:targetSdkVersion="10" />

    <application
        android:icon="@drawable/ic_launcher"
        android:label="googleplaygameservicessample"
        android:theme="@style/AppTheme" >
        <meta-data
            android:name="com.google.android.gms.games.APP_ID"
            android:value="@string/app_id" />
        <meta-data
            android:name="com.google.android.gms.version"
            android:value="@integer/google_play_services_version" />

        <activity
            android:name="jp.blogspot.foolprogrammer.googleplaygameservicessample01_006.MainActivity"
            android:screenOrientation="portrait" >
            <intent-filter>
                <action android:name="android.intent.action.MAIN" />

                <category android:name="android.intent.category.LAUNCHER" />
            </intent-filter>
        </activity>
    </application>

</manifest>
2.「Ctrl+Shift+F」を押し、コードをフォーマッティング。3.「Ctrl+S」を押し、ファイルを保存。
【手順3】
1.「res/layout/activity_main.xml」は以下の通り。
<LinearLayout xmlns:android="http://schemas.android.com/apk/res/android"
    android:layout_width="match_parent"
    android:layout_height="match_parent"
    android:orientation="vertical" >

    <TextView
        android:id="@+id/name"
        android:layout_width="wrap_content"
        android:layout_height="wrap_content" />

    <com.google.android.gms.common.SignInButton
        android:id="@+id/sign_in_button"
        android:layout_width="wrap_content"
        android:layout_height="wrap_content" />

    <Button
        android:id="@+id/sign_out_button"
        android:layout_width="wrap_content"
        android:layout_height="wrap_content"
        android:text="ログアウト"
        android:textSize="12sp" />

    <LinearLayout
        android:layout_width="match_parent"
        android:layout_height="wrap_content"
        android:orientation="horizontal" >

        <Button
            android:id="@+id/clear_closed_achievement_button"
            android:layout_width="wrap_content"
            android:layout_height="wrap_content"
            android:text="初期非表示の実績クリア"
            android:textSize="12sp" />
    </LinearLayout>

    <Button
        android:id="@+id/open_achievement_button"
        android:layout_width="wrap_content"
        android:layout_height="wrap_content"
        android:text="実績を開く"
        android:textSize="12sp" />

</LinearLayout>
2.「Ctrl+Shift+F」を押し、コードをフォーマッティング。3.「Ctrl+S」を押し、ファイルを保存。
【手順4】
1.「src/jp/blogspot/foolprogrammer/googleplaygameservicessample01_006/MainActivity.java」は以下の通り。
package jp.blogspot.foolprogrammer.googleplaygameservicessample01_006;

import android.os.Bundle;
import android.view.View;
import android.view.View.OnClickListener;
import android.widget.TextView;

import com.google.android.gms.games.Games;
import com.google.android.gms.games.Player;
import com.google.example.games.basegameutils.BaseGameActivity;

public class MainActivity extends BaseGameActivity implements OnClickListener {
    private static final int REQUEST_CODE_UNUSED = 10001;

    @Override
    public void onCreate(Bundle savedInstanceState) {
        super.onCreate(savedInstanceState);
        setContentView(R.layout.activity_main);

        findViewById(R.id.sign_in_button).setOnClickListener(this);
        findViewById(R.id.sign_out_button).setOnClickListener(this);
        findViewById(R.id.clear_closed_achievement_button).setOnClickListener(this);
        findViewById(R.id.open_achievement_button).setOnClickListener(this);
    }

    @Override
    public void onClick(View view) {
        switch (view.getId()) {
            case R.id.sign_in_button:
                beginUserInitiatedSignIn();
                break;
            case R.id.sign_out_button:
                onClickSignOut();
                break;
            case R.id.clear_closed_achievement_button:
                clearClosedAchievement();
                break;
            case R.id.open_achievement_button:
                openAchievement();
                break;
        }
    }

    public void onClickSignOut() {
        signOut();
        changeUiState(false);
    }

    @Override
    public void onSignInFailed() {
        changeUiState(false);
    }

    @Override
    public void onSignInSucceeded() {
        changeUiState(true);

        Player player = Games.Players.getCurrentPlayer(getApiClient());
        String playerName;
        if (player == null) {
            playerName = "???";
        } else {
            playerName = player.getDisplayName();
        }
        ((TextView) findViewById(R.id.name)).setText("こんにちは、『" + playerName + "』さん。");
    }

    private void changeUiState(boolean isLogin) {
        if (isLogin) {
            findViewById(R.id.sign_in_button).setVisibility(View.GONE);
            findViewById(R.id.sign_out_button).setVisibility(View.VISIBLE);
            findViewById(R.id.clear_closed_achievement_button).setVisibility(View.VISIBLE);
            findViewById(R.id.open_achievement_button).setVisibility(View.VISIBLE);
        } else {
            findViewById(R.id.sign_in_button).setVisibility(View.VISIBLE);
            findViewById(R.id.sign_out_button).setVisibility(View.GONE);
            findViewById(R.id.clear_closed_achievement_button).setVisibility(View.GONE);
            findViewById(R.id.open_achievement_button).setVisibility(View.GONE);
            ((TextView) findViewById(R.id.name)).setText("こんにちは『???』さん。");
        }
    }

    public void openAchievement() {
        if (isSignedIn()) {
            startActivityForResult(Games.Achievements.getAchievementsIntent(getApiClient()), REQUEST_CODE_UNUSED);
        } else {
            showAlert("実績が見つかりません。");
        }
    }

    public void clearClosedAchievement() {
        if (isSignedIn()) {
            Games.Achievements.unlock(getApiClient(),
                                      getString(R.string.achievement_closed));
        }
    }
}
2.「Ctrl+Shift+F」を押し、コードをフォーマッティング。3.「Ctrl+S」を押し、ファイルを保存。
【手順5】
1.「任意のファイルの作成方法」の手順で「res/values/ids.xml」を作成。
2.「res/values/ids.xml」は以下の通り。
<resources>

    <string name="app_id">【あなたのAPP_ID】</string>
    <string name="achievement_closed">【あなたの実績のID】</string>

</resources>
2.【あなたのAPP_ID】は【準備】の1で作成したゲームサービスのIDを入力します。3.【あなたの実績ID】は【準備】の6で作成した実績のIDを入力します。
4.「Ctrl+Shift+F」を押し、コードをフォーマッティング。
5.「Ctrl+S」を押し、ファイルを保存。
【手順6】
1.「Androidプロジェクトの作成・実行方法(バージョン別一覧)」のAndroidプロジェクトの実行手順で、実行。
※エミュレーターでは「Google Play services SDK」が上手く動かないみたいで、実機で実行する必要があるみたいです。
【手順7】
1.「実績を開く」ボタンを押して、実績を開きます、初期非公開の実績は非公開と表示されています。


以上です。