AndroidでTableLayoutを動的に作成し、セル(行)の高さをウェイトを指定します。
【手順1】
1.「Androidプロジェクトの作成・実行方法(バージョン別一覧)」のAndroidプロジェクトの作成手順で、「AndroidSample36-007-TableLayoutDynamicHeightWeight」といプロジェクトを作成。
※プロジェクトの設定は以下の通り。
※他の項目は任意。
| 項目名 | 項目に設定する値 |
| アプリケーション名(Application Name) | com.example.androidsample36_007 |
| プロジェクト名(Project Name) | AndroidSample36-007-TableLayoutDynamicHeightWeight |
| パッケージ名(Package Name) | com.example.androidsample36_007 |
| Build SDK | API 8 |
| Minimum Required SDK | API 8 |
【手順2】
1.「AndroidManifest.xml」は以下の通り。
<?xml version="1.0" encoding="utf-8"?>
<manifest xmlns:android="http://schemas.android.com/apk/res/android"
    package="com.example.androidsample36_007"
    android:versionCode="1"
    android:versionName="1.0" >

    <uses-sdk
        android:minSdkVersion="8"
        android:targetSdkVersion="17" />

    <application
        android:allowBackup="true"
        android:icon="@drawable/ic_launcher"
        android:label="@string/app_name"
        android:theme="@style/AppTheme" >
        <activity
            android:name="com.example.androidsample36_007.MainActivity"
            android:label="@string/title_activity_main" >
            <intent-filter>
                <action android:name="android.intent.action.MAIN" />

                <category android:name="android.intent.category.LAUNCHER" />
            </intent-filter>
        </activity>
    </application>

</manifest>
2.「Ctrl+Shift+F」を押し、コードをフォーマッティング。3.「Ctrl+S」を押し、ファイルを保存。
【手順3】
1.「res/layout/activity_main.xml」は以下の通り。
<TableLayout xmlns:android="http://schemas.android.com/apk/res/android"
    android:id="@+id/tableLayout"
    android:layout_width="match_parent"
    android:layout_height="match_parent" >

</TableLayout>
2.「Ctrl+Shift+F」を押し、コードをフォーマッティング。3.「Ctrl+S」を押し、ファイルを保存。
【手順4】
1.「src/com/example/androidsample36_007/MainActivity.java」は以下の通り。
package com.example.androidsample36_007;

import android.app.Activity;
import android.os.Bundle;
import android.view.ViewGroup.LayoutParams;
import android.widget.Button;
import android.widget.TableLayout;
import android.widget.TableRow;

public class MainActivity extends Activity {
    @Override
    protected void onCreate(Bundle savedInstanceState) {
        super.onCreate(savedInstanceState);
        setContentView(R.layout.activity_main);

        initTableLayout();
    }

    private void initTableLayout() {
        TableLayout tableLayout = (TableLayout) findViewById(R.id.tableLayout);

        TableRow tableRow1 = new TableRow(this);
        tableLayout.addView(tableRow1, new TableLayout.LayoutParams(LayoutParams.MATCH_PARENT, LayoutParams.MATCH_PARENT, 1));
        tableRow1.addView(createButton("セル1-1"), new TableRow.LayoutParams(LayoutParams.MATCH_PARENT, LayoutParams.MATCH_PARENT));
        tableRow1.addView(createButton("セル1-2"), new TableRow.LayoutParams(LayoutParams.MATCH_PARENT, LayoutParams.MATCH_PARENT));

        TableRow tableRow2 = new TableRow(this);
        tableLayout.addView(tableRow2, new TableLayout.LayoutParams(LayoutParams.MATCH_PARENT, LayoutParams.MATCH_PARENT, 2));
        tableRow2.addView(createButton("セル2-1"), new TableRow.LayoutParams(LayoutParams.MATCH_PARENT, LayoutParams.MATCH_PARENT));
        tableRow2.addView(createButton("セル2-2"), new TableRow.LayoutParams(LayoutParams.MATCH_PARENT, LayoutParams.MATCH_PARENT));

    }

    private Button createButton(String text) {
        Button button = new Button(this);
        button.setText(text);
        return button;
    }
}
2.「Ctrl+Shift+F」を押し、コードをフォーマッティング。3.「Ctrl+S」を押し、ファイルを保存。
【手順5】
1.「Androidプロジェクトの作成・実行方法(バージョン別一覧)」のAndroidプロジェクトの実行手順で、実行。
【手順6】
1.以下の様に表示されれば成功です。
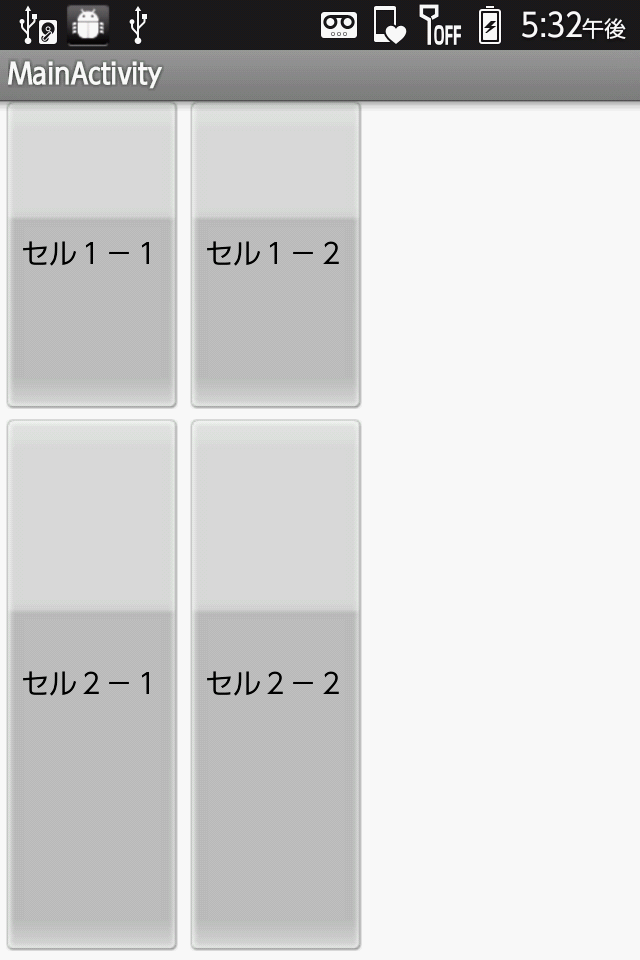
以上です。
0 件のコメント:
コメントを投稿
注: コメントを投稿できるのは、このブログのメンバーだけです。